Welcome to our Resident Evil walkthrough. In the following we treat the approach of Jill Valentine, Chris has some advantages over. He has eight inventory slots and exclusive item with him. In addition, Barry is often to the side and ease in some places. For beginners Jill is the appropriate character.
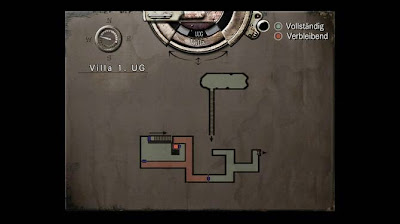
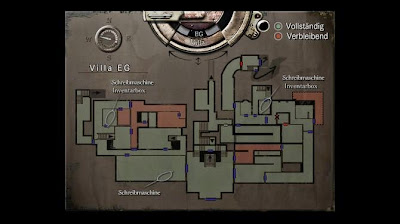
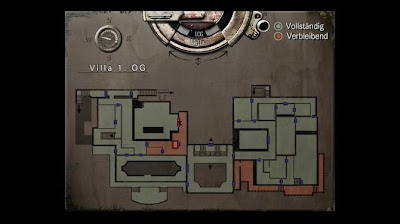
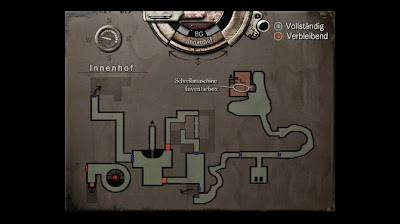
Note that the direct information of the solution refer to the maps. For a better understand I have given space names that refer to characteristics of the rooms. If there are problems of orientation, check out the maps that I have added to the end of the solution.
Table of Contents:
1. First opponent and Sword Key
2. Rifle, chemicals and Dog Whistle
3. Broken rifle and armor key
4. Grenade launcher and first death mask
5. Wind Coat of Arms and sheet music
6. Shield Key and second death mask
7. Third and fourth death mask
8. First stone and metal object
9. Magnum and winds
10. Winds and residence
11. Red Book and control room key
12. Sharks and key Gallery
13. 42 plant and helmet key
14. Eagle medal and battery
15. MO disk and Wolf Medal
16. Coat of Arms and metal object
17. Winds and cylinder
18. Broken flamethrower and stone ring
19. Chain monsters and laboratory
20. MO disk and key laboratory
21. Fuel capsule and power supply
22. Tyrant, Chris and final
Survival Tips
Here we have listed a few tips for you:
1: Take the knife at the first opportunity directly into the Item list. It takes up space and has virtually no benefit.
2: Never wear ribbons - they just wasting space. Where typewriters, are also usually in item list.
3: Not every zombie needs to be shot down. If enough space is there, run over. You will save ammunition...
4: Kerosene! Because you want to burn every zombie (unless you never need in the room), otherwise they are sometime on, and strengthen again.
5: Save rifle ammo and not use it against normal zombies. If it does, then try to land a headshot. If the head explodes, no need to burn the zombies.
6: When you come into a new room and listen to your opponent, but cannot see, then you get easy target. Due to the automatic targeting, the character turns to the opponent, if one is in sight.
7: Hunter acid grenades are very effective.
8: Combined green and red cabbage, to get the maximum healing power.
9: You should never go with a full inventory on a discovery tour. Let's always seat a few left.
10: Request your arms always in between according to the menu. As a result, it prevents lose precious seconds during a confrontation.
1. First Opponent and Sword Key
After the intro you are in the entrance hall of the mansion. Once you can move, you walk to the west in the dining room.
Head over to Barry the fireplace and listen to the dialogue. Then go north into the hallway (Kenneth). Then on to the west, where a zombie eats your colleagues Kenneth. Don’t kill him, but run back into the dining room - Barry does the zombie.
Now back to the entrance hall. Look around a bit until Barry gives you the Dietrich and separates you're in.
To the east you will find a large door to the painting room where you can push the dresser to the statue to obtain the map of Villa EC there.
Now run back to the hall (Kenneth) and examine the Kenneth’s corpse to get Kenneth film.
Go into the next room to the west and go up the stairs to find the next door. You come into the mirror hall. Run up to the southeast until you see a statue with an arrow. The arrow you take and examine to remove the top. At the end of the corridor, lock on the door and come into the 1st floor, dining room.
On the other side you will find a statue and a place where the balustrade is broken. There you push down the statue. Below you can pick up a blue stone.
Leave the room in the east to the 1st floor entrance hall. Run down the stairs and go through the door to the outside painting.
Outside you will find a tomb, where you can use the arrow head. Now you can climb down to tomb and find the book of curse. In it the Sword Key is hidden.
2. Rifle, chemicals and Dog Whistle
Move into the entrance hall and walk east into the painting room. Here you can open the door to the tile hallway.
Cross this to find the next corridor. Here there are four doors. Behind the first there is an outdoor area where you get the chemicals. Behind the second is a bathroom where you can drain the water out of the tub to find a dagger. Behind the third you come into a room where you will find the rifle.
Warning: If you trigger a gun trap!, click on both doors and Barry will save you. If you previously had a sequence with Barry, where he has given you acid grenades, so you will not help Barry. But you can then back into the room and put down the gun. To get the gun, you need the rifle.
Behind the fourth door you will find another hall (wood floor). Right the first door on the west, to get into the hall (storage space east). Before the stairs you'll find the storage space (East). Here are the fuel canister.
Now go back and run up the stairs and pass through the southwestern door into the dark hallway. Besides, you collect the wood mat and run westward through the door into the study. Here you will find the lighter and the dog whistle.
Leave the office and cross the hall (storage space east) to the east and go to the fireplace room. Light the fire with a lighter, then use the wood mat to obtain the map of Villa 1st floor.
3. Broken Rifle And Armor Key
Now go through the dark hallway back to the 1st floor entrance hall and then into the 1st floor dining room in the west.
Now lock the second door on the upper side with the sword key and you come into the 1st floor hallway (storage space west).
At the end of the hallway you can open the back door with the Dietrich and find a storage room - there is the broken gun.
If you own the rifle go into the outdoor and provide the best for the herbs. Now use the dog whistle and there are two dogs approach. Do this with the gun and grab the collar.
Examine this to get the key.
Now run into the mirror hall and there is the door in the northeast (where the zombie is in front). Head over to the plateau with the armor key. Take this and set out the key imitation then.
4. Grenade Launcher and First Death Mask
Go back into the hallway (memory space west) and leave by the door at the end of the hallway. In the next hallway you walk to the south. In the eastern branch you can clean in the room (Tiger bust), where to insert the blue gem.
Climb to the 1st floor entrance hall and go through the door in the southeast. You are back in a small outdoor area. Run as far until you find your dead colleague Forest. Here you can take a grenade launcher. Run the best return. If you continue run you will find still a few herbs, but then Forest will awake and attack you.
Now back to the northeast in the 1st floor entrance hall and through the door. Open with the armor key the metal door and walk into the next room.
Here's a riddle waiting for you - move the armor in this order:
Top Right
Bottom Left
Bottom Right
Now everyone is in place and you can switch (previously NOT press) in the middle of the button. On the wall you can pick up the jewelry box. Examine this to get the first death mask.
5. Wind Coat of Arms and Sheet Music
Climb to the 1st floor hallway (memory space east). There in the middle of a door that you can open it with the armor key. Behind you go through the east door, where another mystery waiting for you.
Examine the room and take fishhooks, bees and bee bait preparation to you. Add the bees bait to where the bees and the bees specimen preparation was to where the bees bait was. Now you push the switch in the preparation. A secret opening present itself to you - grab the Wind Crest.
Now go through the hallway 1st floor (storage space east) in the dark hallway and open the door with the key defense in the south. You can find your colleague Richard, who is poisoned and a serum needs. Now hurry! You must live in the memory space east, there get the serum and back again. It would be advisable if Richard would survive, for you to get automatic rifle later.
Then go to the next door in the following passage (roof). North waits a zombie, eliminate it. Then it passes through the door into a small room. Light the candles using the lighter. Move behind the striking dish shelf to find a secret room with a zombie. There you will find the sheet music.
6. Shield Key and Second Death Mask
Now you walk into the entrance hall, and from there into the dining room. Grab the symbol of the fireplace and walk into the hallway (Kenneth). Here you walk eastward, openin the second door on the left.
You are now in the bar. Behind the piano you will find a passage where you have to move a shelf to get behind another score on the shelf. Combine both sheets of music and use the finished object on the piano.
It opens a secret passage. Take the gold symbol at the statue of you and instead it uses a symbol.
Now run into the dining room and the fireplace is a gold icon. This opens a flap at the clock. Select when the clock "Large" and "Link" from twice so that the little hand pointing south. You will receive the sign key.
Now go back to the hall (Kenneth) and face East. Pass through the first door on the left. The following corridor cross until reach the door in the east that leads you into a greenhouse.
Go to the water pump and use the chemicals. Then turn on the pump and press the red button. The large plant is gone and you can grab the second death mask.
7. Third and Fourth Death Mask
Climb to the 1st floor lobby and then further into the dark corridor in the Northeast. Pass through the first door and walk in the room where your colleague Richard is. Then go into the hallway (roof). Now you can climb the stairs and open the door with the sign key to the roof floor.
Here a battle against a giant snake waiting for you. If Richard has survived, he comes to your aid. Let him best to do everything and run in a circle. In one sequence, Richard is eaten and you're on your own. After a few shots from the rifle, the snake is gone and you can battle.
If you have been poisoned, you need to use once in time into the storage chamber West and the serum.
Otherwise you run the hallway EC (memory space east). Go through the door with the broken handle. Then pass through the door on the south side and come in the Gallery, where many ravens sitting. Cross the gallery to the image "Lisa, protected by the three ghosts". Check it out, but do not press the switch.
Now go to the pictures on the page and press the switch in the second and third image. Then you push the switch of the first image, but from the other side (where the front door is). Last you press the switch when Lisa image. The wall moves and you collect the fourth and final death mask.
8. First Stone and Metal Object
Grab the four death mask and go to the entrance hall. From there you pass through the screen door to outside and walk further into the tomb.
In the crypt you see statue to which you have to use the death mask. If you click on the statue, you get a message that the point at which the statue has holes. Depending on you need to select the appropriate mask hole at the same locations.
Once you have done that, a coffin falls from the ceiling. Examine it and a nasty zombie ascends. Shoot and then dodge when he comes running up to you. After a few shots, the zombie is gone and you can take the stone and metal object from the coffin.
9. Magnum and Winds
Grab the stone and metal object and the Wind Crest in your inventory and put yourself in the hallway (memory space east). From there you go to the southern door in the hallway (wood floor). Pass through the hallway to find her in the northwest another door that leads you out.
Pay attention here on the dog. Run further and set the stone and metal object into the indentation. Pass through the next door and you reach the shed.
Grab all the items and take the southern door to get into the courtyard. Run along the path until you find the red weathercock. Rotates this and let him keep on the west. Now run further until you find the blue Betting Erhan. This you have to judge on the north.
Reach the cemetery. Here you should just go (do not run), so the Raven remain calm. Before you cross the Graveyard, you go to the southern grave stone. Here you can use the wind crest. You can pick up three more coats of arms that you must examine it on the back and then use in the other grave stone and get the Magnum.
Cross the cemetery, pass the following forest section to reach the hut.
Search the hut - store, where appropriate, from - to find the wind in the end. If you want to leave the hut, you'll hit by an opponent to the ground. You wake up again and should disappear quickly and do not attempt to defeat the enemy.
Run back the way you came until you are back in the shed.
10. Winds And Residence
If you are in the shed again, open the west door - you get to the courtyard (Pavilion). After the sequence you take the three dogs and go up the north stairs and pass the next door.
You obstruct a pool of water. In the western area you can use the winch and lower the water level. Climb down the ladder and on the other side up again. Follow the path until you reach an elevator that leads you to the farm (waterfall).
Run to the west, past the waterfall, and open the next gate.
Run along the following route quickly (snake fall down from above) and you reach the hall (entrance) in the residence. Turn to the west and open the first southern door - you will find the storage space. Save the game and sort your inventory if necessary.
11. Red Book and Control Room Key
Go back into the hallway and pass through the large door in the east - you reach the Residence bar.
Kill the spider. A second spider can be found at the bar. On the counter you collect the red book. On the pool table you realize the numbers that are red, orange and green ball.
Red: 3
Green: 6
Orange: 5
Also ignite the three oil lamps (at the entrance, pool table, bar) and you notice the symbols.
Now back into the hallway (entrance). Here you go in the southern corridor to the wall. Because over the broken planks you can not run because there ascend tentacles. Thanks to the box you come without prejudice to the other side and into another hallway.
There are two doors. At the first "gallery". The second room is number 002 - go there. After the sequence you enter the room and meet Barry. Examine the room and move the first bookshelf forward and the second to the right.
Then you analyze the bathroom and grab the residence key.
Run now back to the hallway and use the key in the room 001, which is located across from the storage room. Examine the room and here is also in the bathroom. Let out the bath water and take the control room key.
12. Sharks and Key Gallery
Move into the room 002 and climb down the ladder that you have found behind the bookshelves.
Run as far until you find three boxes that push you into the water basin to cross it. Thanks to the next door you reach the Aqua Ring (main area).
Run clockwise - along the wall - until you reach the stairs and the door that leads to the control room. Pay attention to the natural sharks and never stop. Thus, using the control room key, in order to achieve the control room.
Climb down the ladder and look at the equipment. Press the switch to drain the water. A shark crashing against the window - now it Fast:
Raise the safety mechanism
Set the control lever for the pressure chamber to
Oil pressure regulator to control (valve 2)
Raise the safety mechanism
Set the control lever for the pressure chamber
Let off the water
Leave the control room through the northwest door. Now you can find two doors - one in the north and west. Go through the western and you come to the Aqua Ring (main area). Run up to the podium at the end and shoot the shark on the way.
When you want to take the key, the large shark move again. Move the Apparatus before you into the water and place around the power lever. Then collect the residence key (gallery) in the water.
Run into the room, and now go through the north door. Here go up the ladder and you come back to the beginning. From here, you go back to the room 002nd
13. 42 Plant And Helmet Key
From Room 002 of you go into the hall and open with the key you just obtained the gallery. Run in the new room purely in the northern corridor where you will find a corpse - take with the bug spray.
Now back out from the gallery into the hall. Run in the hallway by Northern access - in room 002 over - up to the wall where the map of the residence depends. Take with these and pump into the hole the insect repellent pure.
Run back to the gallery, and then in the northern corridor - this time on the corpse over. At the end you can take the residence key on the desk.
This also use in the rooms 003 (east door). Here you can store and find a bookcase with red books, here you put your a red book. Sort the books correctly and trigger the mechanism. Now if you go through the door, you have to fight against a giant plant. Do you want to work around that there is an alternative route.
For the alternative route go back out of the room and look at the west door. Here you have to enter a code, you should definitely have notice this at the oil lamp symbols. The code consists of the numbers 3, 5 and 6 - the order may differ from passage to passage.
In the next room you collect three empty containers and now need a poison for the plant mix. You can do three liquids in the empty container, the red liquid yellow liquid and water. This is a value assigned to each:
Water = 1
Red = 3
Yellow = 6
You have to mix it now that you come to "20" at the end. If you combine two liquids, the new fluid has the sum of the two. For example: 1 (water) + 6 (yellow) = 7 (green)
So you should mix:
1 (Water) + 3 (Red) = 4 (Purple)
4 (Purple) + 6 (Yellow) = 10 (Orange)
1 (Water) + 6 (Yellow) = 7 (Green)
10 (Orange) + 7 (Green) = 17 (Blue)
17 (Blue) + 3 (Red) = 20 (V-Jolt)
Now you just need to find a place where you can use the poison. This site can be found at the Aqua Ring. Thus run over room to the control room 002 and then on to Aqua ring (main portion). In the west you will find a room with the tentacles of the plant 42 - is here the V-Jolt.
Now you walk back towards the gallery and continue to Room 003. Use the secret passage, which you have previously opened. There follow a sequence. Then you can get the helmet key from the fireplace.
14. Eagle Medal and Battery
Now you can go back to the mansion. Once you are in the mansion, you will be attacked by a Hunter - so watch out!
Then go into the hallway (memory space east), where also a hunter waiting for you. Go up the stairs and run to the east and open the door at the end of the hallway. You come into the room with the fireplace, where did you get the card from the second floor. Here you can watch the second door with your new key to open and enter the studio.
Move the statue in the room purely up to the wall at the end. The wall of the left and right move now direction center. You can now run around the wall and press there a switch that brings the walls to the starting position. Now quickly to the statue and push back on the predict position. It opens a secret passage where you jump into the hole.
Take and verify Last, Volume I, to get the eagle medal. Then you press the switch on the grave stone and climb the ladder down to the basement.
Pay attention here to the great spiders, which can poison you. Once you've passed the first area, you have the second run at the fork to the north and replacing a fuse, so that the elevator is running again. Through the door in the south you come into the kitchen and take the elevator to the top.
In addition to two zombies you can find here in the southwest, a small storage room, where you will find the battery. Once that's done, you unlock the other door in the room above and enter the hall (mirror), where the arrow you had found.
15. MO Disk and Wolf Medal
If you are in the hall (mirror), you walk to the north and embark in the hallway 2nd floor (storage space west). Here you can watch the door on the west wall open and enter a small puzzle room. Turn out the light and push the two dressers on the wall to the deer and bull's head, have the flashing gem in the eye sockets. You must accept this without the eagle look in your direction. So, for example, only run all the way to the right and then quickly to the other side, climb on the dresser and grab the stone. If you do that, you get the red and yellow gem.
Use the yellow gem in the Tiger bust to get the MO disk.
Now go back to the hall (mirror) and open the door to the northeast, so that you get into the room with the armor, where you have the armor key. At the end of the room, you can open the door and move toward the roof.
In the next room, where you will be attacked again at the end of the boa - climb down to the library. If you use the acid grenades the battle should not take long.
Remember this is the place where the books off the shelf fell and collect Last Book, Volume II. Examine the book to get the wolf medal.
16. Coat of Arms and Metal Object
Now it's time again to visit the hall. Here you can open with the helmet key the northeastern door.
Cross the next room and you get into a new room with a large mirror - Warning Zombie! In the closet you find a treasure chest which needs to combine with the red gem.
It waits a little puzzle for you. The biggest piece coming down the right, the second largest after the upper left. The third largest upward to the right, the second smallest to the bottom left and the smallest in the middle.
Once you solve the puzzle, you get the Coat of Arms. So you go to the eye-catching in the corridor (wood floor) - the hallway just before the exit to the outside on the east side of the mansion.
Open the room, turn on the lamp and collect the metal object.
17. Winds and Cylinder
Now you run back out to the shed. Then on to the courtyard (Pavilion) up to the section with the pond and then take the elevator to the yard (waterfall). Addiction in the south to the elevator and make full use of the battery.
Take the elevator up to the courtyard (Pavilion) and go to the section with the pool of water to raise the water level with the winch. Now run back and take the elevator back down. The waterfall is gone and you can into it. Climb the ladder down into the ground.
Directly to the door on the west side. Cross the following cave passage and you reach an area with a lift. When the power supply to the east you can take a tube.
Then go through the door to the south. Here is a sequence you meet your colleague Enrico, who is close to death. He holds a hexagonal wind in your hand that you can collect it.
Go back (pay attention to the Hunter) to the cave passage at the beginning with the typewriter. Run past this and use at the end of your new winch.
Open the door and walk in the next room to the great rock, examined it. On the way back it threatens to overwhelm you - quickly back to the door. The rock rolled over and the path is now clear. In the next room, waiting a big spider. Once this is done, you collect a knife and cut through the cobwebs at the door on the south side.
In the next gear you can collect some medicinal herbs, if you have been injured or poisoned. Then it goes through the next door to the west. In the next area you will find again a mechanism where you have to use the winch three times. Another stone rolling towards you. Run quickly to a safe area.
Now follow a mystery. Move the statue to the eye-catching bright spot on the wall. Then use the wind in the mechanism. Now you can push the statue on the round top, so that the statue looks in the same direction as the other. Now you have the statue only in the free space slide into the wall. You gain the cylinder.
18. Broken Flamethrower and Stone Ring
Now you walk to the elevator on the east side and go to the power company. Combined the tube with the cylinder - by turning you will receive a combination of numbers: to be 4231. This you type in order to bring the elevator up and running.
Take the elevator down - follow a sequence with Barry. At the bottom pass through the door on the west side. Follow a round cave passage where the scary monster with the chains you try to pursue. Make sure that you will not get caught and open the door to the east.
Here push the big box on the transport pod and actuate the switch.
Run back to Barry who makes straight out of the dust. Examine now the southern area. Run past the item box and then down the ladder. The transport gondola with the box is there. Move the box in the trash compactor and activate the switch. Collect the defective flamethrower.
So you go back into the round cave passage. On the south side of the tour there is a switch that flips. At the door in the northwest, a mechanism is activated - run fast and then lay there on the flamethrower. Now you can pass the door.
Run over to the water section. Follow the path - Attention snake - collect the jewelry box and climb up the ladder. Climb the next ladder and you'll find yourself in the cottage again.
Now you have to get back to the mansion. Take the shed before the stone and metal object again.
19. Chain Monsters and Laboratory
Once in the mansion, you take the stone out of the ring jewelry box and combine this with the metal object, you get another stone and metal object. You should now have two pieces, with which you move into the entrance hall.
Run up the stairs to the door, from the origin of the eerie sounds. Set here the stone and metal objects.
Save up and pass the following courses up to the sequence with Barry. In the middle of the conflict emerge chain monster. Give Barry back the weapon so that he can assist you in battle.
Shoot even on the monster, but push down the four blocks of stone, so that at the end of the stone coffin is opened - the monster now adopted by itself.
Now go on to the elevator and ride high. In the fountain you're looking for two indentations where you have to use the Eagle and Wolf medal. Go down the stairs and take the elevator to the lab.
In the room go down the ladder (input) to come into the storage space.
20. MO Disk and Laboratory Key
After you have saved, you go through the big door in the hallway (stairs). Here are two zombies that you should burn - kerosene can be found here as well. Go to the end of the corridor to the west and only collect the MO disk on the desk. Then go down the stairs and open the screen door.
Go directly to the western door next to you. Then immediately in the southern door next to you, where are you in the X-ray room.
Gather here the two X-ray images and attach them to the others. Now turn on the red light and you will see light as individual regions in the images red. You will find the password CELL. In the document you will also learn to use name JOHN and the user password ADA.
Leave the room afterwards. Now run to open the door in the northeast. In this room you will find a computer where you enter the user name and the password as JOHN ADA. Then you unlock the rooms in B-2F and 3F B-CELL with the password.
Now return to you door in the northwest of flat. Then continue in the study on the north side. Kill the zombie here and go to the desk where you will find a transmission device - using the MO disk.
Now go back to the stairs and run to the upper floor. Head over to the door in the northeast, to enter the screening room - gather here another MO disk. Here you will receive the code 8462. Use this to open a secret room. Here you can watch Kenneth film and collect a key laboratory.
21. Fuel Capsule And Power
With the new key you go back down the stairs. Here you open the two doors in the southeast and go through the big door.
Push the shelf in front of you on the wall and then climb up to the ventilation shaft and crawls through. On the other side you walk to the northern ventilation shaft above the dresser and creep through again. Pay attention to these strange insect beings you can do it with a grenade. You will find a desk with a further transmission device where you can use an MO disk. Then shift the shelves and leave the room.
You should be in the tour again, now it passes through the small door in the southeast. In the new area you will find a lift in the northeast and east of the memory space 3.UG. You must continue in the southern region - arm yourselves out with grenade launchers.
In this area, you go first to the southwest and collect the fuel capsule. So you have in the office, where you have the first MO disk use in an input device. There is a refilling device that charges the fuel capsule.
Now you can use the capsule. Along the way, you must not run! Once that's done, You pass through the door in the southeast. In the next room you'll find straight in southeastern an input device - MO disk use. Then go through the door in the southwest.
Now run to the south side and turn on the power to the main lift.
22. Tyrant, Chris And Final
Arm yourself from acid grenades, grenade launchers and some herbs and then go to the elevator - Barry stays with you now. At the top you collect the ammo and go into the laboratory where Wesker is waiting for you. After the sequence is followed by a struggle against the tyrant. Shoot it with the acid grenades and keep enough distance after each shot - after about four hits it sinks to the bottom. Go to Barry and unlock then the electronic lock in the Northeast and leave the lab.
An alarm activate! Now it is down to the Chris time. Run the itinerary in the door in the northwest. Here you can find in the West the mechanism that you have unlocked with the MO disks. Go through the door to the west and climb down the stairs. Open the cell and freed Chris.
Now you walk up into the storage space. Packt Magnum ammunition in your inventory and sufficient healing may store! Climb up the ladder, where Chris and Barry are awaiting. Pass through the door.
Run down the hall and pick up the fuse box, which you use before the last door. Take the flares and used them. Now comes the final boss battle against the tyrant.
Keep with your Magnum on it and run away as soon as the tyrant charging you. A hit draws you from massive energy. If he grabs you, you can use the stun gun as a defense. After a few hits Brad throws you to the rocket launcher. Collection. Objectives. Results!
The tyrant is history and Resident Evil hereby played through. Congratulations!
Map - Villa 1.UG
Map - Villa EC
Map - 1st Floor Villa
Map - 2nd Floor Villa
Map - Courtyard
Map - Courtyard 1.UG
Map - Courtyard 2.UG
Map - Aqua Ring 1.UG
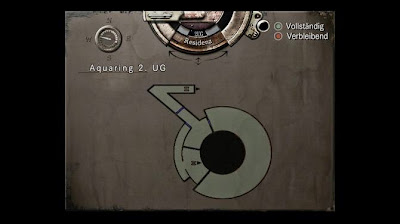
Map - Aqua Ring 2.UG
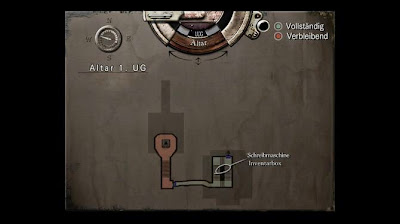
Map - Altar 1.UG
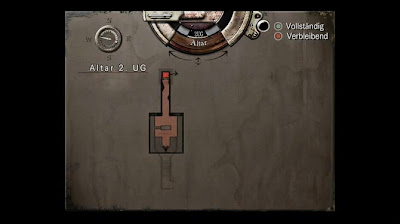
Map - Altar 2.UG
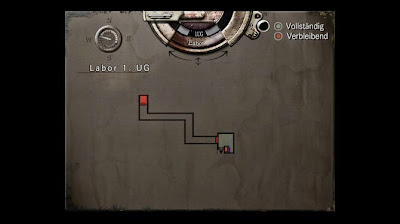
Map - Laboratory 1.UG
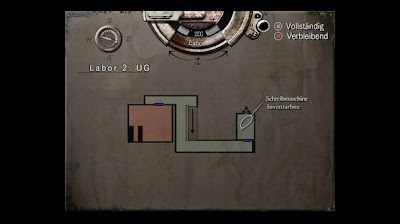
Map - Laboratory 2.UG
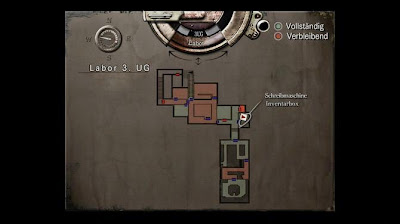
Map - Laboratory 3.UG
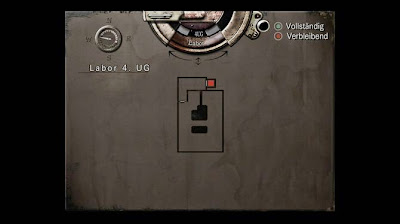
Map - Laboratory 4.UG


Comments
Post a Comment