The Goblin Sword solve all levels. Find out locations of all the chests, treasures, and win all hidden crystals in each session. Finally, fill of tips and advice to get you started in this action game and Pixel Art action platformer. This complete walkthrough will also detail all Bosses.
Table of contents
Game Basics
The gameplay:
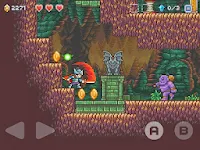
The grip Goblin Sword is simple, two buttons on the left to head an A button to type and the B button to jump, double tap on it to make a double jump. As you advance, you also collect magic orbs to trigger the power of your sword for a while.
The great difficulty of the app is the management of the three hearts, since if you die you have to restart the level.
In each level you have to find two chests containing gold, weapons and other awards. You also need to find three crystals to unlock the latest paintings.
The world:
The world map of Goblin Sword consists of five parts: the home, the merchant, the forest, the castle and caverns.
In your home, is your grandfather, it tells you the list of memories you have found and quests to complete. You can also decorate with as you progress .
At the dealer you can buy swords, armor and relics. New features come to add over your findings.
In the forest is the first 18 levels and two first boss: Minotaur and Werewolf.
In the castle is the other 18 levels and two other bosses: mummy and skeleton king
In the caves is the last 18 levels and the last two bosses: The Warg and the Sorcerer of Darkness.

Swords:
The swords have three characteristics: attack, speed and striking distance. Their power is indicated by stars.
| Name | Location | Price |
| Iron Sword | Dealer | - |
| Dagger | Dealer | 200 |
| Katana | Dealer | 400 |
| Gladius | Dealer | 500 |
| Ice Sword | Dealer | 800 |
| Fire Sword | Dealer | 1000 |
| Shadow Blade | Dealer | 1200 |
| Rune Blade | Dealer | 1400 |
| Wave Sword | Dealer | 1800 |
| Cutlass | Dealer | 2200 |
| Excalibur | Dealer | 2800 |
| Dragonslayer | Dealer | 3000 |
| Broadsword | Safe level 4 forest | - |
| Holy sword | Safe Level 15 forest | - |
| Iron Claws | Safe Level 3 Castle | - |
| Flamberge | Safe Level 12 Castle | - |
| Thunder Spear | Safe Level 3 of the cave | - |
| Morning Star | Safe level 12 of the Cave | - |
| Masamune | Safe level 6 castle | - |
The Armor:
Armors are actually costumes, they are purely cosmetic.
| Name | Location | Price | Description |
| Iron Armor | Dealer | - | Rusty iron armor |
| Viking Armor | Dealer | 200 | Armor worn by the Norse warriors |
| Ninja Suit | Dealer | 400 | Light armor ideal for stealth mission |
| Lion Skin | Dealer | 600 | Outfit made of animal skin |
| Dark Armor | Dealer | 800 | Full armor manufactured in darkness |
| Titan email | Dealer | 1000 | Solid armor made by giants |
| Noble Armor | Safe level 12 cave | - | Golden armor made for the lords |
Relics:
The relics are accessories, each giving a particular advantage.
| Name | Location | Price | Description |
| During Holy | Dealer | - | Pendant given by your grandfather |
| Red Ring | Dealer | 400 | Increases gain precious stones |
| Heart Ring | Dealer | 300 | Increases gain hearts |
| Blue Ring | Dealer | 200 | Increases gain orbs of magic |
| Enchanted Mirror | Dealer | 200 | Lets see the lives of enemies |
| Shadow Cloak | Dealer | 400 | Increases movement speed |
| Cursed Ring | Dealer | 1000 | Increases Attack but lowers Defense |
| Mythril Helmet | Dealer | 1000 | Augment the length of invincibility after injury |
| During Ghost | Dealer | 1000 | Summons a ghost keeper |
| During drangon | Dealer | 1500 | Summons a dragon guardian |
| Wizard's staff | - | - | Slightly increases your magic bar |
| Gem idol | Safe Level 4 of the castle | - | Attracts gems and coins |
| Pyro vest | Safe Level 1 cave | - | Jacket that protects lava |
| During Fairy | Safe Level 2 caves | - | Summons a fairy guardian |
| Winged Boots | Safe Level 8 caves | - | Boots to do a triple jump |
| Magic Shuriken | Safe level 15 of the Cave | - | Shuriken protector that turns you around |
| Red Feather | Safe level 11 Castle | - | You once saved a fall |
| In Phoenix | Safe level 11 of the Cave | - | Summon a phoenix guard |
Souvenirs:
The memories are objects that are found in chests or beating the boss, they just used to decorate your home.
| Name | Location | Description |
| Oil Lamp | Safe level 3 forest | Oil lamp |
| Wooden Clock | Safe level 6 forest | Small clock in Mahogany |
| Dinner Plates | Level 2 Safe Castle | Plates inlaid with gold edges |
| Vase | Safe level 9 Castle | Porcelain vase with oriental decorations |
| Jewellery box | Safe Level 13 Castle | Jewelry box leather and wood |
| Chair | Safe Level 2 Castle | Chair in cherry |
| Old Map | Safe level 15 of the Cave | Papyrus card, with strange writings |
| Minotaur statue | Beat the boss: Minotaur | Imposing statue carved inston |
| Holy Armor | Beat the boss: Werewolf | Armor can ward off evil powers |
| Sarcophagus | Beat the boss: Mummy | A piece of the coffin of the mummy |
| Battle Axe | Beat the boss: King skeletons | Ax that belonged to the king of skeletons |
| Ceramic Armor | Beat the boss: Warg | Light armor made for goblins |
| Candlestick | Safe Level 5 Castle | Brass Chandelier |
The Forest:
This part of the guide Goblin Sword on iPad / iPhone, shows the location of all the chests and all the crystals of the forest.
World 1
First crystal: in front of you right after the little boy who teaches you how to jump.
Second crystal: beside the tree, just after the little boy who tells you the double jump.
Third crystal: just above second step onto the platform to reach it.
Safety first: stand on the left after the boy teaches you double jump, run into the wall that tells you the farmer, the trunk is at the end of the tunnel: it contains diamonds.
Second Vault: continue your way after the third crystal, it is just left, it contains diamonds.
World 2
First crystal: in the small ledge hidden behind a wall to the right of the spring.
Second crystal: after spring continue to the left is the crystal on a ledge next to the mushrooms.
Third crystal: after gun, stand on the platform, the crystal is in a dead end on the right.
The first chest: he left the second crystal, stand on the dock and kill the bird to reach it contains diamonds.
The second safe: it is deadlocked with the third crystal, it contains diamonds.
World 3
First crystal: in the beginning, before descending jump onto the small ledge, a passage is concealed in the wall, crystal is the red dragon.
Second crystal: retrace your steps after taking the trunk, it is just below the ledge next to the snake.
Third crystal: continue driving, it is in the water under the bridge where the pig walks.
Safety first: a bit further after the first crystal, it contains diamonds.
Second Vault: is in a small cave, hidden by the wall behind the moving platform. It contains the oil lamp.
World 4
Crista the first: it is on the ledge where the second rolling ball tip.
Second crystal: it is in a wall to the left of the last ball tipped jump to reach it.
Third crystal: after the character who learns that you vials of life, jump right wooden spikes, to find a passage. The crystal is a little further to the left on a small block of land.
Safety first: at the beginning, use the spring to jump into a hidden room above the entrance. It is down the wooden steps it contains a life potion.
Second boot: it is on the ledge just to the left of the last crystal, it contains the sword, broadsword.
World 5
First crystal: in the beginning, get in the water on the left, the crystal is in the right wall.
Second crystal: a little further down on the right side of the platform and laying down, the crystal is in the wall next to the water with piranha.
Third crystal: come up with the platform to the left of the gun and the well, the crystal is on a pontoon at the top right.
Safety first: come up with the moving platform and go left, the trunk is below the elemental earth. It contains diamonds.
Second boot: just before killing the mob with the boomerang, jump into the hole on the left chest is deep behind a serpent.
World 6
First crystal: after gun, drop down and head left after the crystal is.
Second crystal: fall after the spring, the crystal is in the wall next to the wooden stakes.
Third crystal: in a building on the road, just before the end.
Safety first: step onto the small ledge just above the red dragon, then head to the left, jumping from block to block, the boot is at the end, it contains the memory Wooden clock.
Second Vault: with spring jump on the left chest is behind the earth elemental, it contains diamonds.
World 7
First crystal: it is in the ledge behind the barrel.
Second crystal: after taking the second chest out start on the left deadlocked jump to discover a passage, the crystal is at the end.
Third crystal: located below the second blade moves up and down, just before the end
Safety first: it is on the left of the spring, to achieve you have to open a door. The key to the latter is in the wall just above the right. It contains diamonds.
Second chest. Jump to reach it in the wall behind the snake to open a passage. The trunk is further up. It contains a life potion.
World 8
First crystal: it is behind the first spiked ball.
Second crystal: it is in the wall just to the right of the spring.
Third crystal: it is on the left, after the second chest.
Safety first: with the spring mount on the left, go ahead and fall into the small hole, jump on the left during the descent to reach the chest. It contains diamonds.
Second Vault: It is in the room behind the door, the key to the latter is in the jar just before getting to first chest It contains diamonds.
World 9
First crystal: from the beginning, scroll down on the left, it's right after water.
Second crystal: after crossing the piles, kill the snake right behind him jump into the ceiling to find a passage. The crystal is in the upper left.
Third crystal: fall under the blade, it is in the left wall of water.
Safety first: early, stand on the log with the barrel, mount and the boot is on the left.
Second Vault: continue your way after taking the second crystal, it is a little further behind the mob with the ax. It contains diamonds.
World 10
First crystal: early turn around to climb on ledges, it is at the top.
Second crystal: Go to the right, after the bats, jump on the platform to the right, let you down with the second to grab.
Third crystal: just before the end, go down to the left to find the crystal end in stalemate.
Safety first: it is a little further after the second crystal. It contains diamonds.
Second boot: when you jump from post to post above water, let yourself fall in the penultimate pool to discover a passage containing the trunk. It contains a Life Potion.
World 11
First crystal: it is on the left of the moving blade.
Second crystal: with spring, stand on the platform, then head to the left, move forward to achieve the crystal.
Third crystal: when you go looking for the second crystal, drop you to the first platform, it is below.
Safety first: after taking the second crystal, let down with the platform, then jump into the hole on the right, the chest is a little further behind the blade.
Second Vault: jump into the wall on the right and help you the platform where was the third crystal. It contains the relic. Wizard's staff.
World 12
First crystal: jump into the wall to the left of the red dragon to find a hole.
Second crystal: continue to climb then go left before the well, the crystal is just after the small blocks of land.
Third crystal: after opening the second safe return right, drop down to grab the crystal in the ledge along the wall.
Safety first: to the left of the second well, the key to open the door is in the jar in front of the second crystal. It contains diamonds.
Second Vault: after the second well, falling into the small hole in the ground, it conceals a spring, mount and go to the left to find the chest. It contains diamonds.
World 13
First crystal: after taking the first chest, keep the crystal is just to the right of the tree.
Second crystal: it is in the wall behind the second box.
Third crystal: it is on a ledge at the top right of the spring.
Safety first: Following the removal of the golem, go down the left, a pass is hidden in the back wall, down through the platforms to reach the chest. It contains diamonds.
Second boot: mount with spring and go left, kill the birds to cross the ravine the trunk is a little further to the left. It contains diamonds.
World 14
First crystal: it is on the dock at the top right where the pig ballad.
Second crystal: return to the beginning, but this time down the left, cross the ravine with a double jump to reach the crystal.
Third crystal: it is in the water a little further after the last boot.
Safety first: jump into the wall behind the first crystal, at the end of the tunnel is the trunk. It contains diamonds
Second boot: in the area where you are going through with the moving platforms above the piles, drop down into the hole to reach the chest. It contains diamonds.
World 15
First crystal: it is on the road behind the ball tip.
Second crystal: continue driving normally, but on the dock jump to the left to reach a small block of land and the crystal.
Third crystal: after collecting the second crystal, turn back, and get after the roll, the crystal is in a ledge on the right piles.
Safety first: get under the golem from dust, then continue on your way to the right to reach. It contains diamonds.
Second Vault: jump into the left wall of the second crystal. It contains the sword: Holy sword.
World 16
First crystal: the beginning of the level he's behind the first blade. Jump when it comes to you and bounce before falling.
Second crystal: it is between two plates, a little further after taking the second box.
Third crystal: just after the second crystal, jump into the left wall of the platform which holds the mob throwing bombs.
Safety first: at the well with the golem of land, jump behind it. The trunk is a bit further in a cave with piles.
Second Vault: behind the spring run into the right wall at the end of the tunnel is the trunk. It contains the armor: Royal Mail
The Castle
This part of the guide Goblin Sword on iPad / iPhone, shows the location of all the chests and all the crystals of the castle.
World 1
First crystal: In the building behind the block with the tips.
Second crystal: After the skeleton, jump into the wall above the green platform.
Third crystal: Climb to the top of the second block with the points just before the end of the level.
Safety first: After the first skeleton, cross the column behind him, after the wall conceals a passage containing the safe. It contains a life potion.
Second Vault: Knock petty cash and bring the red button, it opens a door just right, the safe is behind. It contains diamonds.
World 2
First crystal: Above the spider is left boardwalk.
Second crystal: after the second chest to find your way to the left to take the leave before crystal.
Third crystal: in the skeleton with the spear, jump into the wall above the block with tips to get the crystal.
Safety first: Break the blocks to the right of the spring, in the next room jump into the wall behind the three parts, the chest is in a small room. It contains diamonds.
Second trunk: left snake jump into the ceiling over the four parts, to discover a passage, go left, you arrive at six columns. . Jump on the third to fall into a hole containing the safe. It contains the memory: Dinner Plates.
World 3
First crystal: It is the right of the second box, fall to catch.
Second crystal: at the green platform with the bird, go left and jump into the void above the skeleton to catch the crystal.
Third crystal: after killing the purple ogre, jump into the right wall before descending.
Safety first: at the beginning, first ride with spiked platforms to reach the upper left chest.
Second Vault: Just after the first snake, jump into the ceiling where pass block spikes at the top left is the trunk. It contains the weapon: Iron claws.
World 4
First crystal: Always before the mob cannon, jump in building on the right to find the crystal.
Second crystal: Continue your progress, it is below the block spiked attention to his fall.
Third crystal: during the chase with the balls to point, scroll down completely to catch the crystal in the hole.
Safety first: Before you get on the platform with the cannon, jump into the void on the right to find the chest at the bottom left. It contains diamonds.
Second chest: the chest is protected by a door, the key to it is above the first block spiked in the right wall. It contains the relic. Idol Gem.
World 5
First crystal: mount behind the first barrel left with ghosts platforms to find.
Second crystal: after walking with guns, jump into the wall of the second column to climb to the top and reach the crystal.
Third crystal: stand on the green platform above the spiked block, jump to the left to make the crystal on the ledge.
Safety first: go through the wall behind the second gun left open. It contains diamonds.
Second Vault: after lowering the cannon on the left, scroll down to the bottom right to find a passage, follow him to press the button. Go ahead and go back over to the chest. It contains the memories: chandelier.
World 6
First crystal: break the blocks around the spring and jump to the left. In the next room, grab the crystal with the platform under the skeleton.
Second crystal: It is located in the wall behind the wooden box.
Third crystal: it is in a small protected by retractable spikes, just before the end of the level capacity.
Safety first: it is later in the same room as the first crystal. It contains diamonds.
Second trunk: Use the wooden box hidden under the red boulders button before the final to open the door. The first button opens a dissimilated in the wall just above the right door. It contains the sword Masamune.
World 7
First crystal: just jump on the platform with spikes at the beginning of the level.
Second crystal: it is in a building on the right of the barrel.
Third crystal: just above the skeleton with spear.
Safety first: after taking the second crystal, go right and jump on the next snake through the platform with spikes. Down the hall, press the button to open the door above you. The chest at the bottom contains diamonds.
Second chest in room with the third crystal, use the wooden box to get on the right wall. Press the button and then go on, in the three wooden platforms, jump on the little blue box on the left of the tips. On the wall is the trunk, it contains diamonds.
World 8
First crystal: fall into the ground behind the first gun to find.
Second crystal: break the four blocks of stone above the skeleton, the crystal is at the bottom on the left.
Third crystal: later in the level you come to a column of five breakable blocks, do not break the first three to get on platforms left. Continue on to the left to find the third crystal.
Safety first: Before mounting to continue, jump to the right above the starting points of the columns. Off the ledge to reach the chest on the right. It contains diamonds.
Second Vault: same path as the third crystal, just keep a little more to the left. It contains a life potion.
World 9
First crystal: next to the block with the tips.
Second crystal: It is with the second box.
Third crystal: it is just past the purple ogre, take it with attention to the block with the tips.
Safety first: let yourself fall into the ground under the block with spikes in the passage below is the trunk. It contains diamonds
Second Vault: continue your way normally and at the purple ogre pass under the green platform to the left, a door is concealed in the wall. The key lies in a wall before the top of the two columns is located after the first crystal. The trunk contains the memories behind: vase.
World 10
First crystal: It is located in the wall behind the first box.
Second crystal: it is beneath the ghost platform, grab it with a jump just when it reappears.
Third crystal: Continue on and go left at the armor, the crystal is a little further to the left.
Safety first: the beginning of the level, go up completely on the left with the ghosts platforms to find the first box. It contains diamonds.
Second safe: follow the same route as the third crystal, then continue climbing, a passage is concealed in the wall to the left. The chest contains diamonds.
World 11
First crystal: jump over the skeleton with spear from the right wall.
Second crystal: it is just above the mob throwing axes.
Third crystal: a little further down the road, there is a hole where the block down with the tips.
Safety first: from the beginning, jump left from the small blue block, a hole is hidden in column. The box below contains the relic. Red Feather.
Second Vault: go under the platform where the mob walks throwing axes, the boot is on the wall. It contains diamonds.
World 12
First crystal: returning with the key, let yourself fall into the hole to the right of the torch.
Second crystal: from the second trunk, continue your ascent, the crystal is in the right wall.
Third crystal: continue on your way, the crystal is left of the purple ogre.
Safety first: when you go to get the key, go behind a hole in the ground will take you to the boot. It contains the sword Flamberge.
Second trunk.. Down the hall with the points on the ground, jump into the wall to find a passage. Then you use the spring to go through the ceiling and reach the chest above. It contains diamonds.
World 13
First crystal: in the left wall of the first block with the tips.
Second crystal: below the five destructible blocks, get into the wall to take the crystal.
Third crystal: just before finishing the level, stand on the windowsill to catch.
Safety first: Use your destructible blocks to climb on platforms above. Continue driving up avoiding the bird to get to the trunk. It contains the memories: Jewelry Box.
Second boot: mount with the blocks to rotating axes, jump up behind the skeleton and use a double jump to go back in the building containing the safe. It contains diamonds.
World 14
First crystal: it is right on the dock of the first trunk.
Second crystal: go your way after the second box, it is in the dock with the pig on the left.
Third boot: it's in the wall to the left of the torch just before finishing the level.
Safety first: initially come up with the spiked platforms on the left. The chest is at the top. It contains diamonds.
Second safe: it is in a hidden in a wall behind the right gun bathroom It contains diamonds.
World 15
First crystal: jump on the block with an ax to achieve during the crossing.
Second crystal: After purple ogre, drop down on a red platform, cross, take the crystal before the platform bar too far.
Third crystal: When you return from last trunk, it is in front of you.
Safety first: during the cross with red platforms, climb to reach the green corridor and trunk. It contains diamonds.
Second Vault: same path as the second crystal, same must be open before the start of the platform. It contains the memory: Old Map.
World 16
Caverns
World 1
First crystal: normally progress through the level, it is on the road behind the two blades.
Second crystal: Continue your drive, it is in an alcove in the wall above the head that spits small fireballs.
Third crystal: Turn back after the first boot, mount the blocks with the axes. The crystal is in the wall behind the sorcerer left.
Safety first: After the second crystal, go left, you come to a door. The key to the latter is in the wall in front of the four parts. The trunk is a bit higher on the left, jump with the spring to reach. It contains the relic: Pyro Vest
Second Vault: It is on the left on the final descent. We must break the wooden box before the floor breaks. It contains diamonds.
World 2
First crystal: Advance normally in the level, it is to the right of the first lava lake.
Second crystal: continue your progress, it is in the air next to the sorcerer.
Third crystal: at the end of the level, grab it with the red moving platform by jumping over the blades.
Safety first: from the beginning, jump over the mob that throws the balls, the trunk is in a cornice, it contains the relic: Fairy During
Second Vault: down with the small platform next to the blade, if you do not have the Pyro Vest, jump into the left wall to cross. The chest is at the bottom left. It contains the memories: Armchair.
World 3
First crystal: it is behind the left wall of the mob throwing balls spiked.
Second crystal: after the first safe, keep to the right at the head of flame-breathing, jump on the left platform. Down the road is the crystal.
Third crystal: in the same place for the second crystal, let yourself fall under the green platform instead of going to the left.
Safety first: while climbing with brittle blocks, jump into the wall at the top left to find a button. This opens the door a little further to the right below the big pig. At the bottom is the safe, it contains the weapon: Thunder Spear
Second Vault: continue driving after the second crystal, a little further, help you from small unstable platform to mount take the chest. It contains diamonds.
World 4
First crystal: early, stand with the spring on the right, jump up on the left. Then drop down and jump to the left with a double jump to reach the crystal.
Second crystal: progress through the level, and go with the block with an ax. Then go behind the flame to find a small tunnel concealed opposite is the crystal.
Third crystal: it is above peak just before the end of the level.
Safety first: follow the same path as the second crystal. The boot is on the ledge opposite. It contains diamonds.
Second trunk: in the part with the metal platforms, go to the far right, use the small unstable platform to jump into the wall and find the chest. It contains a life potion..
World 5
First crystal: progress through the level and go up with the spring after taking the key. The crystal is a little further, you just have to jump to take.
Second crystal: fall into the ground through the cracked front spiked platforms block. Below, grab the crystal falling into the hole, double jump to go up before succumbing.
Third crystal: just before the end turn right up through the blocks with the axes
Safety first: follow the same route as the second crystal, the safe is behind the door on the right. The key of the latter is to the top level next to the spring. It contains diamonds.
Second trunk: Use you spring after the sorcerer jumping to the left in the air doing a double jump by returning you to reach the chest. It contains diamonds..
World 6
First crystal: jump into the right wall during your descent with the mobile mini-platform from the beginning.
Second crystal: it is behind the mob throwing balls at the end of the descent that takes you to the first crystal.
Third crystal: following your rise with the spring, cross the green columns, drop down to the last to cross the floor and find the crystal.
Safety first: early start to the right level. Help yourself to a cracked back to the left and reach the chest blocks. It contains diamonds.
Second safe: continue your progress, jump into the right wall where you need to come up with the spring avoiding fireballs. The stash of diamonds.
World 7
First crystal: after first boot, resume your route, the crystal is in the right wall of the first blade.
Second crystal: it is located at the top right for the cross on the blocks cracked.
Third crystal: it is next to the big pig in armor at the end of the level.
Safety first: the beginning of the level, go down and come up with the platform Jump on the ledge right before you impale in points. The stash of diamonds.
Second Vault: continue your way, below the purple ogre down with the small platform to get to the trunk. It contains diamonds.
World 8
First crystal: after first boot, return to the beginning and continue to drive normally. Then, cross the lava with blocks, jump across the wall above the green columns.
Second crystal: on the road, jump over the blade to catch it.
Third crystal: it is in a hole, just before the end.
Safety first: from the beginning of the table, jump into the wall in front of you. On the other side, go up with earth blocks to get to the trunk. It contains the relic.. Windged Boots.
Second trunk. Before finishing the level, jump on the left to climb on a ledge. The trunk is over, it contains diamonds.
World 9
First crystal: come up with the spring in the left wall. The crystal is behind the spider.
Second crystal: it is right next to the first drop down into the hole to take.
Third crystal: it is below the rotary axes, let yourself fall behind just before the flame.
Safety first: a little later in the level, go up with the platforms without touching the tips. After, help you mini platforms to reach the chest.. It contains diamonds.
Second Vault: way down the first fall between the peaks and the column with the head spits flame. Now jump to the left to cross the wall and find the chest. It contains diamonds.
World 10
First crystal: it is at the top left just after the sorcerer. Help yourself to the mini platform to catch it..
Second crystal: it is to the left of the second part of the chest, just after the two gargoyles.
Third crystal: it is in an alcove in the wall above the final statue.
Safety first: at the heads spit flames, jump into the wall at the top left to find a corridor. At the end is the safe containing diamonds.
Second Vault: after taking the first crystal, get, when you get red dragon, jump over spikes through the wall. The trunk is up, you use the spring to reach. . It contains Armor Noble Armor
World 11
First crystal: it is behind the door at first, open it go to the right.
Next, stand on the block with the ax, jump into the ceiling to find a box. Scroll down the box and push it under the block to press the button. You just have to go back to the door looking for the crystal.
Second crystal: it is just above the snake after crossing the floor spikes with red platform.
Third crystal: it is on the right of the last blade, take it down.
Safety first: it is the first crystal, it contains diamonds.
Second Vault: during the crossing with the red platform, jump into the ceiling to find a ledge. It contains the relic: For Phoenix
World 12
First crystal: it is to the right of the first blade level.
Second crystal: it is below the third block with spikes, drop the block and take it during its ascent.
Third crystal: take it with red platform between the two blades before finishing the level.
Safety first: over the first blade jump into the left wall. On the other side climb with spiked platforms to find the trunk below. It contains the weapon. Morning Star
Second Vault: in the spring, jump left to find a corridor, the chest is at the bottom. It contains diamonds
World 13
First crystal: on the way, it's down the stairs where the mob throws balls.
Second crystal: continue normal operation after the big pig in armor, mount with the right platform before descending.
Third crystal: it is behind the block edge, do get to take.
Safety first: cross the wall on the left of the blue platform the stash of diamonds.
Second safe: it is hidden in the ground under the platform that allows you to mount the second crystal. It contains a vial of life.
World 14
First crystal: at the beginning of the level, the crystal is on the tiger's head left.
Second crystal: get on the blocks above the statue, then continue your ascent on the left with broken blocks to reach the crystal.
Third crystal traveling up the second trunk, it's just right on the head of the tiger.
Safety first: get off on the right of the flame, before getting to the rest of the way.
Second crystal: Push the crate on top of the purple ogre left. Then jump down and use the cash to jump into the right wall and reach the chest... It contains diamonds.
World 15
First crystal: after first boot, continue driving, then enter the wall next to the fox.
Second crystal: while climbing with flames, cross the wall to the left of the last flames to find.
Third crystal: it is in the block with the ax, left Lake final washing.
Safety first: in ghosts platforms, use the elevator and jump on the mini platform to the left to find the chest. It contains the relic: Shuriken
Second Vault: during your ascent between the flames, pass the wall on the right of the first flames.
World 16
World 16
* Hint: in this level go for the relic * In Phoenix
First crystal: at first you have to jump through blocks with Axes.
Second crystal: it is in the wall behind the mob cannon, after the second box.
Safety first: after walking with the skeleton and barrel, go down to the left, behind the skeleton with a sword run into the wall. At the bottom of this corridor is that the chest containing the sword. Demon Blade.
Second Vault: after climbing the stairs with the tips, go left. Then jump on the blocks with axes to cross on the other side you use the spring to finally reach the chest. It contains diamonds.
Caverns
World 1
First crystal: normally progress through the level, it is on the road behind the two blades.
Second crystal: Continue your drive, it is in an alcove in the wall above the head that spits small fireballs.
Third crystal: Turn back after the first boot, mount the blocks with the axes. The crystal is in the wall behind the sorcerer left.
Safety first: After the second crystal, go left, you come to a door. The key to the latter is in the wall in front of the four parts. The trunk is a bit higher on the left, jump with the spring to reach. It contains the relic: Pyro Vest
Second Vault: It is on the left on the final descent. We must break the wooden box before the floor breaks. It contains diamonds.
World 2
First crystal: Advance normally in the level, it is to the right of the first lava lake.
Second crystal: continue your progress, it is in the air next to the sorcerer.
Third crystal: at the end of the level, grab it with the red moving platform by jumping over the blades.
Safety first: from the beginning, jump over the mob that throws the balls, the trunk is in a cornice, it contains the relic: Fairy During
Second Vault: down with the small platform next to the blade, if you do not have the Pyro Vest, jump into the left wall to cross. The chest is at the bottom left. It contains the memories: Armchair.
World 3
First crystal: it is behind the left wall of the mob throwing balls spiked.
Second crystal: after the first safe, keep to the right at the head of flame-breathing, jump on the left platform. Down the road is the crystal.
Third crystal: in the same place for the second crystal, let yourself fall under the green platform instead of going to the left.
Safety first: while climbing with brittle blocks, jump into the wall at the top left to find a button. This opens the door a little further to the right below the big pig. At the bottom is the safe, it contains the weapon: Thunder Spear
Second Vault: continue driving after the second crystal, a little further, help you from small unstable platform to mount take the chest. It contains diamonds.
World 4
First crystal: early, stand with the spring on the right, jump up on the left. Then drop down and jump to the left with a double jump to reach the crystal.
Second crystal: progress through the level, and go with the block with an ax. Then go behind the flame to find a small tunnel concealed opposite is the crystal.
Third crystal: it is above peak just before the end of the level.
Safety first: follow the same path as the second crystal. The boot is on the ledge opposite. It contains diamonds.
Second trunk: in the part with the metal platforms, go to the far right, use the small unstable platform to jump into the wall and find the chest. It contains a life potion..
World 5
First crystal: progress through the level and go up with the spring after taking the key. The crystal is a little further, you just have to jump to take.
Second crystal: fall into the ground through the cracked front spiked platforms block. Below, grab the crystal falling into the hole, double jump to go up before succumbing.
Third crystal: just before the end turn right up through the blocks with the axes
Safety first: follow the same route as the second crystal, the safe is behind the door on the right. The key of the latter is to the top level next to the spring. It contains diamonds.
Second trunk: Use you spring after the sorcerer jumping to the left in the air doing a double jump by returning you to reach the chest. It contains diamonds..
World 6
First crystal: jump into the right wall during your descent with the mobile mini-platform from the beginning.
Second crystal: it is behind the mob throwing balls at the end of the descent that takes you to the first crystal.
Third crystal: following your rise with the spring, cross the green columns, drop down to the last to cross the floor and find the crystal.
Safety first: early start to the right level. Help yourself to a cracked back to the left and reach the chest blocks. It contains diamonds.
Second safe: continue your progress, jump into the right wall where you need to come up with the spring avoiding fireballs. The stash of diamonds.
World 7
First crystal: after first boot, resume your route, the crystal is in the right wall of the first blade.
Second crystal: it is located at the top right for the cross on the blocks cracked.
Third crystal: it is next to the big pig in armor at the end of the level.
Safety first: the beginning of the level, go down and come up with the platform Jump on the ledge right before you impale in points. The stash of diamonds.
Second Vault: continue your way, below the purple ogre down with the small platform to get to the trunk. It contains diamonds.
World 8
First crystal: after first boot, return to the beginning and continue to drive normally. Then, cross the lava with blocks, jump across the wall above the green columns.
Second crystal: on the road, jump over the blade to catch it.
Third crystal: it is in a hole, just before the end.
Safety first: from the beginning of the table, jump into the wall in front of you. On the other side, go up with earth blocks to get to the trunk. It contains the relic.. Windged Boots.
Second trunk. Before finishing the level, jump on the left to climb on a ledge. The trunk is over, it contains diamonds.
World 9
First crystal: come up with the spring in the left wall. The crystal is behind the spider.
Second crystal: it is right next to the first drop down into the hole to take.
Third crystal: it is below the rotary axes, let yourself fall behind just before the flame.
Safety first: a little later in the level, go up with the platforms without touching the tips. After, help you mini platforms to reach the chest.. It contains diamonds.
Second Vault: way down the first fall between the peaks and the column with the head spits flame. Now jump to the left to cross the wall and find the chest. It contains diamonds.
World 10
First crystal: it is at the top left just after the sorcerer. Help yourself to the mini platform to catch it..
Second crystal: it is to the left of the second part of the chest, just after the two gargoyles.
Third crystal: it is in an alcove in the wall above the final statue.
Safety first: at the heads spit flames, jump into the wall at the top left to find a corridor. At the end is the safe containing diamonds.
Second Vault: after taking the first crystal, get, when you get red dragon, jump over spikes through the wall. The trunk is up, you use the spring to reach. . It contains Armor Noble Armor
World 11
First crystal: it is behind the door at first, open it go to the right.
Next, stand on the block with the ax, jump into the ceiling to find a box. Scroll down the box and push it under the block to press the button. You just have to go back to the door looking for the crystal.
Second crystal: it is just above the snake after crossing the floor spikes with red platform.
Third crystal: it is on the right of the last blade, take it down.
Safety first: it is the first crystal, it contains diamonds.
Second Vault: during the crossing with the red platform, jump into the ceiling to find a ledge. It contains the relic: For Phoenix
World 12
First crystal: it is to the right of the first blade level.
Second crystal: it is below the third block with spikes, drop the block and take it during its ascent.
Third crystal: take it with red platform between the two blades before finishing the level.
Safety first: over the first blade jump into the left wall. On the other side climb with spiked platforms to find the trunk below. It contains the weapon. Morning Star
Second Vault: in the spring, jump left to find a corridor, the chest is at the bottom. It contains diamonds
World 13
First crystal: on the way, it's down the stairs where the mob throws balls.
Second crystal: continue normal operation after the big pig in armor, mount with the right platform before descending.
Third crystal: it is behind the block edge, do get to take.
Safety first: cross the wall on the left of the blue platform the stash of diamonds.
Second safe: it is hidden in the ground under the platform that allows you to mount the second crystal. It contains a vial of life.
World 14
First crystal: at the beginning of the level, the crystal is on the tiger's head left.
Second crystal: get on the blocks above the statue, then continue your ascent on the left with broken blocks to reach the crystal.
Third crystal traveling up the second trunk, it's just right on the head of the tiger.
Safety first: get off on the right of the flame, before getting to the rest of the way.
Second crystal: Push the crate on top of the purple ogre left. Then jump down and use the cash to jump into the right wall and reach the chest... It contains diamonds.
World 15
First crystal: after first boot, continue driving, then enter the wall next to the fox.
Second crystal: while climbing with flames, cross the wall to the left of the last flames to find.
Third crystal: it is in the block with the ax, left Lake final washing.
Safety first: in ghosts platforms, use the elevator and jump on the mini platform to the left to find the chest. It contains the relic: Shuriken
Second Vault: during your ascent between the flames, pass the wall on the right of the first flames.
World 16
* Hint: in this level go for the relic Pyro Vest *
First crystal: it is the wizard behind after the first lava lake.
Second crystal: after climbing the stairs with the flames down on the left behind the ogre to find.
Third crystal: a little further down the road, he landed on a ledge to the right of the two blades.
Safety first: after crossing the spiked platforms, jump into the wall on the top right. On the ledge, get into the ceiling to find the chest behind the tips. It contains diamonds.
Comments
Post a Comment