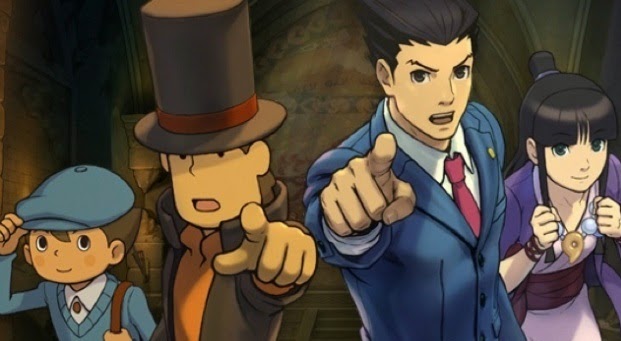
Mix a lawyer, an archaeologist, a touch of puzzles, sprinkle with witchcraft and you get Professor Layton Vs Phoenix Wright: Ace Attorney. Capcom and Level-5 publishers have decided to bring together two of their biggest stars in this release on 3DS, mixing the individual style of each series, namely the trials and puzzle solving. Accompanied by your faithful acolytes Maya and Luke, you are thrown into the mysterious city of Labyrinthia which is inside a book. Listening only to your courage and sense of logic you decide to solve the dark secrets of this world.
If, however, your sense of justice is shrinking too, DTGReviews helps you in this comprehensive guide to Professor Layton Vs Phoenix Wright for your reserve''picarats increases and reserve your room'' SOS'' is not shrinking. Here you will find the solution of each puzzle
Table of Contents
Prologue: On a dark stormy night (Layton)
Prologue: volte-face in London (Phoenix)
Chapter 01: Labyrinthia
Puzzle 01-14
Puzzle 15-28
Puzzle 29-42
Puzzle 43-56
Prologue: On a dark stormy night (Layton)
Apartment:
Parts SOS x3:
In the left frame of the window, chandelier and the phonograph on the right.
After a few cutscenes that arise in the context sweetness of this episode, you find yourself in the apartment of Professor Layton together with Luke. Dear Layton quickly remind you of the use of the microscope and offers to search the room to find your first puzzle. Following this little brainstorming, you receive a visit from a mysterious girl, listen to the discussion and talk to him.
Bank of the Thames:
Parts SOS x3:
In the tree on the roof of the Tower Bridge and the e lamppost.
After removal of Aria, you follow up bank of the Thames where you will find your old friend Inspector Chelmey. Latter teaches you to move around the map and shows you the direction of the park before continuing your journey, talk to Barton that you submit the enigma 2.
The park:
Parts SOS x3:
In the lamp above the bench on the lamp at the bottom left on the bench.
You are on the scene of the accident strange, as usual start by searching the hint coins coins pocket, look at the car in the tree, you will be stopped by a policeman who will ask the puzzle 3. Obtaining leave to remain at the scene of the accident, the teacher teaches you to use the'' zoom'' with blue magnifying glass, so enjoy your new knowledge to inspect more closely the statue on the right.
Having learned your first conclusions, return to the inspector Chelmey on the banks of the Thames. After the discussion, go to the Tower Bridge in the east of your location.
Tower Bridge:
Parts SOS x3:
On the flag right, double lamp and left on top of the bridge.
Again Professor, will share his knowledge by teaching you how to move in a setting with the yellow arrows. Start by taking the hint coins, this is done you can go under the bridge to find the cape of Aria.
Tunnel on the bridge:
Parts SOS x3:
They are left on the lamp, the lamp closer to you on the right and double lamp at the bottom left.
Collect three new pieces SOS available here, then look at the symbol on the wall to access the puzzle 4.
Secret passage:
Parts SOS x3:
In the open box to the right on the lamp on the left wall and lamp right in the tunnel.
After the cutscene, you're in the secret passage, the three hint coins, picked up your booty, watch the feet protruding boxes on the right to grant the poor unfortunate solving the puzzle 5.
Prologue: volte-face in London (Phoenix)
In this chapter you get to know Phoenix Wright and his assistant Maya, Aria called to defend our two friends are at the London court. After the conversation, the judge decides to ask you a few routine questions, first just answer'' Aria.'' For the second, you must touch the icon'' case file'' Maya which reminds you of the operation.
After this little check, so you can answer the second question by theft and assault.'' Serious cases may begin with the first witness on the stand, the goalkeeper Thibault Gaus, listen to his testimony, the judge then asks if you know how to use the'' against''-examination, if you are a regular to this kind game select'' apply.''
Listen again to the testimony of the custodian, then the prosecutor will bring a new case by presenting a picture of'' crime scene'. Again, scroll evidence for Maya teach you to present evidence.''
During the'' against''-examination, submit the photo of locations when the witness said:'' In a few seconds I was able to determine that there was nothing unusual about the scene.'' Suddenly the witness and the witness will change brings new evidence to the case by presenting its'' super'' torch, the most important fact is that it is covered with chocolate.
Continue listening to the testimony of the new guard, and when he says:'' I saw this girl attack the crew member. She stood in front of her at this time,'' the'' present'' medical report. Hardly shaken, Gaus recovers and presents new evidence,'' Brigadier'' plate leprechaun that Aria had in his hand, following these new revelations the judge decides a break.
During the break, chatting with Aurora that asks you to allow Aria to be condemned, so it is quite upset that you return to non trial without added'' log'' Maya to evidence. The trial resumes with a new witness, Marina Plankton stove boat and blow the victim Aria bar. Listen to his testimony, then the prosecutor will present a new proof photo prints Aria on the iron rod.
Proceed to cons-examination, then when Marina said:'' Despite its small size, it has dealt a severe blow, I tried to avoid'', present photo prints. You must then say that contradicts his testimony, so select the position'' fingerprint'' to embark on a demonstration.
Marina then change a bit his testimony, so prove Aria can not type while holding the bar upside choosing:'' Prove that there is a contradiction.'' Why present the medical report'''', which prove Aria is too small.
The prosecutor will make a new objection on fingerprints, to counter choose the answer:'' attempting to defend.'' After your demonstration, you pointed out that there are no other marks on the bar, you conclude that the attacker wore gloves. Marina wants you to believe that the guard was also so for refute this accusation choose:'''' it is impossible to be able to show evidence.
Then show the flashlight, in fact it is covered with chocolate fingerprints, it proves that the guard was not wearing a glove. The prosecutor presents a new piece for the record,'' Leprechaun'' Brigadier damaged during the fight, follows a new testimony of Marina.
During the cons-examination, when Marina says:'' I tore this toy hands of the thief, then I gave the police'', present plate ripped… Proving that there is a plate too you have to say why so choose:'' it replaced the plush.''
Marina again blaming the guard, you must prove his innocence so choose:'' it is impossible.'' Following the various objections, the time has come to refouiller the boats so choose the option:'' demand'' a search to find the missing toy.
But why Marina does not want to dig for knowledge present'' log'' to make the connection with the theft of jewelry. Confusing Marina, you win your first trial, however, you still do not know who struck Marina in the hold, stay tuned ....
Chapter 01: Labyrinthia
Parts SOS x3
Lantern in the ceiling, floor and at the register in the bag on the bench on the left.
Following your downfall in the book, you wake up in a cart, start by finding parts SOS then discuss with the seated figure on the right. Following discussion with the talk box that will take you into the city.
Main Street
Parts SOS x3
On the green flag over the blue tent right in the garden right under the arch on the green awning on the right under the arch.
At the end of the kinematics and different conversations talk with the two knights who offer the puzzle 06. Satisfied knights, talk with the two children, Tim and Tam, they will ask the puzzle 07. By resolving you have access to parts hidden by SOS children.
Center of the city
Parts SOS x3
In the fountain below the statue, in the flower pot right bard and on the roof of the white house on the left.
You can now move to the center of the city, go to discuss Arriette, it teaches you a great event will happen in North Parade Avenue. Now talk to the bard, it will offer the puzzle 08, the card restored the bard tells you different neighborhoods giving you access.
Eastside
Parts SOS x3
On the sign of the bakery right in the barrel right in the foreground and purple flag settings.
Start by visiting the East neighborhood, collect coins SOS then discuss with the blond boy named Peter, he asks you the puzzle 09. With nothing to do in this area yet go to the West district.
West Ward
Parts SOS x3
On the sign of the blacksmith left in the fruit basket placed on the barrel right and the purple flag in the top right.
You're in the neighborhood of the forge, as always take the hint coins then discuss with the knight who will ask the puzzle 10. It satisfies it is time to leave for North Parade Avenue.
North Parade Avenue
After conversations with different people, contemplate the kinematics of the arrival of the Narrator, after some discussion these events succeed and you get a page of'' history'' that you read immediately. Learning the characters of the story are surely you want to stop the knights but you ultimately saved by Aria, so flee with him to the east of the city to reach the edge of the belfry.
Around the belfry
Parts SOS x3
In the barrel right in the window at the top left and the far left applies.
Now you must head to the area is to go to the bakery. Before that you can stop on the square belfry.
Place the belfry
Parts SOS x3
On the mantelpiece purple roof left in the bric-a-brac on the right and on the fireplace in the yellow roof on the right.
There you can talk with Tim Tam and again, the two children will give you the puzzle 12. This time it really is time to go to the bakery.
The bakery
Parts SOS x3
In the logs in the bread oven on the candle to the wall to the right of Phoenix and baguettes in the basket on the left.
In the bakery you come across Maya and Phoenix trying to knead bread, following discussions you can retrieve the hint coins. It is time to question our duo, so talk with Maya, then you teach them how a puzzle with the number 13 works. You also experience Madeleine, then you get into the room to chat with Aria.
Aria's room
Parts SOS x3
In dried on the left wall in the fruit basket right in the bowl of cat on the carpet flowers.
Small usual ritual, collect hint coins and speak with Aria, you learn more about his adventures since she left you in London and its past. She also learns of a book of witchcraft that you can view in the Library, before leaving Madeleine offers the puzzle 14.
Entrance to the Library
Parts SOS x3
In the vase on the left pillar on the owl statue on the roof and in the small bush left Arlette.
Front of the library you meet again Peter, following discussion with the latter, look for hint coins. Before returning you can chat with Colette messenger with Arlette then that gives you the puzzle 15.
Grande Bibliotheque
Parts SOS x3
Torch on the wall to the right of the office, on the big purple and black flag in the center and red stained glass in the upper left.
In the library you know Gauthier, then you can retrieve the hint coins before discussing with Amy Stere. The latter is willing to let you see the book if you solve its puzzles, namely 16 and 17. Before you go to the private reading room, talk Gautier who will ask the puzzle 18.
Reading Room Private
Parts SOS x3
The candle is on the cabinet right in the third lantern from left hanging from the ceiling and down the curtain on the left.
Finally, in the room you are chatting with the librarian, then consult the book. Following discussions back in the room to pick up the pieces SOS. Back in the lobby and zoom in on the red and blue symbol above the desk, it triggers the 19 enigma that once resolved opens a secret passage. In the basement you learn more about the Great Witch Arcana then you get out of the library.
Labyrinthia night.
As Aria is a party, you can go to the bakery and walk a little, choose this option to glean some history puzzles.
Barbenfurie gives you the puzzle 21 North Parade Avenue
Cindy gives you the puzzle 22 in the western area
Colette gives you the puzzle 23 in the high street
It is recovered three puzzles you can go to the bakery to discuss with Maya and Phoenix. After the conversation you learn the arrest of Aria and closing the first chapter.
Puzzle 01-14
This part of the comprehensive guide of Professor Layton Vs. Phoenix Wright: Ace Attorney 3DS, presents puzzles 01-14 to part with Professor Layton and Luke. Some are required for the course of history and some are optional. But the more you do the more you earn puzzles precious "picarats" increasing your final score. With this walkthrough you avoid using your hint coins or lower your score.
Puzzle 01: two witches (20 picarats)
Chapter: Prologue
Location: Office of Layton
Type: Create a path
Solution:
For this first puzzle you have to cross the two witches to bring them to their respective castle, to get off the blue and green paths.
Puzzle 02: Feeding Barton (30 picarats)
Chapter: Prologue
Location: Bank of the Thames
Type: Arrangement
Solution:
To make the smile dear Barton and that the investigation could take are over you must reconstruct her hamburger. To do this you must put all the pieces.
Puzzle 03: Enhanced Security (25 picarats)
Chapter: Prologue
Location: Park - accident
Type: Stealth
Solution:
In this puzzle you must go through the museum without being detected by the guards. To achieve your goals safely follow the following path:
low x4
right
low
right x3
top
Right x2
top
low
high x2
right
high x2
low
Right x2
top
low x5 then exit right.
Puzzle 04: Wall Puzzle (40 picarats)
Chapter: Prologue
Location: Tunnel on deck
Type: Arrangement
Solution:
For this puzzle you must reconstruct the symbol with the small pieces scattered. Using the stylus, plug the holes to open a secret passage.
Puzzle 05: Rescuing Aria (20 picarats)
Chapter: Prologue
Location: Mysterious Piece
Type: QCM
Solution:
Here you have to find the correct connection string to untie the knot, choose between option A or B to deliver Aria. The solution B is the response.
Puzzle 06: Swords and Shields (35 picarats)
Chapter: Chapter 01: Labyrinthia
Location: Main Street
Type: Arrangement
Solution:
In this puzzle you must place all the knights in good order for it to be protected with their shields if they are attacked with a sword.
Puzzle 07: The Music Box (20 picarats)
Chapter: Chapter 01: Labyrinthia
Location: Main Street
Type: Touch
Solution:
In this puzzle, you must ensure that all figures you look. To do this you must press the colored buttons: attention every button moves two figurines.
The correct order is:
yellow
red
yellow
red
blue
red
Puzzle 08: Shreds card (30 picarats)
Chapter: Chapter 01: Labyrinthia
Location: Centre of the city
Type: Arrangement
Solution:
In this puzzle you must recompose the city map to be put pieces
Puzzle 09: Pantin pieces (30 picarats)
Chapter: Chapter 01: Labyrinthia
Location: District is
Type: Pool
Solution:
In this puzzle, you must reconstruct six little puppets, finding their 2 hands, 2 feet and 1 chest over his head. To rebuild all the boxes'''' color it as shown below:
Puzzle 10: suspicious Shadows (20 picarats)
Chapter: Chapter 01: Labyrinthia
Location: West Borough
Type: QCM
Solution:
In this puzzle you have to find the shade belonging to the knight. The correct answer is B
Puzzle 11: The Royal victim (30 picarats)
Chapter: Chapter 01: Labyrinthia
Location: West Borough
Type: Deduction
Solution:
In this puzzle you must find out who killed the king listening to the testimony of each suspect. The killer is actually a killer but she hides under armor so this is the knight.
Puzzle 12: Crossing nebula (20 picarats)
Chapter: Chapter 01: Labyrinthia
Location: Place Belfry
Type: Touch
Solution:
In this puzzle, you must build a bridge cloud, why follow these guidelines:
Pitch black cloud environments.
Off white cloud environments
Climb the center of the cloud trio right
Puzzle 13: Miche superfluous (40 picarats)
Chapter: Chapter 01: Labyrinthia
Location: Bakery
Type: Arrangement
Solution:
In this puzzle, you need to find the loaf too observing the patterns on the cakes. Loaf too is that with orange marmalade and two incisions down up and down.
Puzzle 14: As the seam (40 picarats)
Chapter: Chapter 01: Labyrinthia
Location: Bakery
Type: Buffer
Solution:
In this puzzle you must print the pattern on the fabric using a buffer. By following these instructions you should achieve your goals:
Foot of the balance:
Start by printing the bottom of the scale
go back one space: print
go back one space: print
Right tray:
Print the tray base
move buffer a box to the left and a box at the top: print
move buffer a box to the left and a box at the top: print
Left tray:
Print the tray base
move buffer a box to the right and a box at the top: print
move buffer a box to the right and a box at the top: print
print the center of the pattern
Puzzle of 15-28
This part of the comprehensive guide of Professor Layton Vs. Phoenix Wright: Ace Attorney 3DS, presents puzzles 14-28 to part with Professor Layton and Luke. Some are required for the course of history and some are optional. But the more you do the more you earn puzzles precious "picarats" increasing your final score. With this walkthrough you avoid using your hint coins or lower your score.
Puzzle 15: Daedalus nebulous (30 picarats)
Chapter: Chapter 01: Labyrinthia
Location: Library: entry
Type: Navigation
Solution:
In this puzzle, you must help Luke to find his way in a cloudy maze. The path to follow is;
First tray:
down, left, up, left, up, right, down, right, up, right, down, right, up, right, down, right, down, left, down and jump into the black hole.
Second shelf:
left, up, left, up, right, up, left, down, left, up, right, down, right, up, right, down, left, down, left, up, and jump on the fluffy cloud.
Third shelf:
top, right, left, jump into the black hole, jump on the fluffy cloud and into the black hole.
Sixth plate:
right, up, left, down, right, up, left, down, right, down, left and jump into the black hole.
Seventh tray:
right, up, left, down, up, right, down, right, you've arrived.
Puzzle 16: Daedalus clocks (20 picarats)
Chapter: Chapter 01: Labyrinthia
Location: Grande Bibliothèque
Type: Labyrinth
Solution:
In this puzzle, you need to cross the little knight through the hands clock knowing that they are shifted by a quarter every time you go. The right path is the following:
right x3
low
right
top
low
Right x2
low x2
left
right
Puzzle 17: Daedalus evil (40 picarats)
Chapter: Chapter 01: Labyrinthia
Location: Grande Bibliothèque
Type: Labyrinth
Solution:
In this puzzle, you also need to cross the little knight by using needles clocks. But if the white clocks always shift a quarter, violets clocks are shifted by three quarters. The right path is the following:
right x5
low
left
low
top
low
right
low
top
low
right
top
low
right
Puzzle 18: Slice organized (20 picarats)
Chapter: Chapter 01: Labyrinthia
Location: Grande Bibliotheque
Type: Arrangement
Solution:
In this puzzle you must store the books that form a pattern to help you look at the size, color and shape of the wafer books.
Puzzle 19: Shifting the Stars (30 picarats)
Chapter: Chapter 01: Labyrinthia
Location: Grande Bibliothèque
Type: Travel
Solution:
In this puzzle you must reverse the patterns dragging them into the rail to help you have a location higher up. A video worth more than 1000 twisted explanations that follow it to arrive at the solution:
Puzzle 20: Daedalus nebulous 2 (50 picarats)
Chapter 03: The Great Witch
Location: Place Belfry
Type: Navigation
Indices:
Solution:
In this puzzle you must help Maya find his way in a cloudy maze. Despite appearances, you do not have so many choices that, in the first two parts simply follow the path to fall in the first two black holes. The third part skip the fluffy cloud bottom. Continue to follow the paths falling into black holes and when you get to the four clouds choose the top right to go back.
Following this jump you have to choose the right black hole, then drop down to the last plateau where you just have to follow the path to reach Wright.
Puzzle 21: Rotary House (30 picarats)
Chapter 01: Labyrinthia
Location: North Parade Avenue
Type: Rotations
Solution:
In this puzzle, you must turn all the candles in the house by breaking the knight, but if you pass on a candle you turn it off. The way to solve this case is as follows:
Left rotation x4
Right rotation
Left rotation
Right rotation x10
Left rotation
Right rotation
Left rotation
Puzzle 22: Caprice Doll (25 picarats)
Chapter 01: Labyrinthia
Location: West End
Type: Deduction
Solution:
In this puzzle you must meet dolls correctly assigning their rooms by folding up their requirements. Finally, the solution is simple because it suffices to replace the doll B by C.
Puzzle 23: The starry path (20 picarats)
Chapter 01: Labyrinthia
Location: Main Street
Type: 3D puzzle
Solution:
In this puzzle you must help Luke through a starry path by choosing to take the way up or down, the solution is High.
Puzzle 24: Multicolor Flower (30 picarats)
More Sharing ServicesMore Sharing Services
Chapter 03: The Great Witch
Location: Path of court
Type: Alignment
Solution:
In this puzzle you must help a fairy reconstruct a perfect flower petals by arranging the shapes and colors. Ribs ribbed petals must be the same color or the same shape.
Taking rose petal down as a reference and turning from left to right the solution is as follows:
Rose petal
Green petal teeth, green petal rounded, double green petal rounded
Purple petal
Double rounded petal orange, orange petal tip
Blue petal tip, rounded blue petal, petal blue tooth
Puzzle 25: canine Delivery (40 picarats)
Chapter 03: The Great Witch
Location: North Parade Avenue
Type: Navigation
Solution:
In this puzzle you must help Brasier to pick up any mail in the streets of the city. For this you have several letters that will change direction, the willingness of letters for all pick is:
Blue
Three red
Blue
Two red
Blue
Puzzle 26: Mouse in a box (30 picarats)
Chapter 03: The Great Witch
Location: West Borough
Type: Arrangement
Solution:
In this puzzle you have to put the mouse in two boxes, depending on whether they are nice or not. You have eight mice, two boxes and two illustrations to help.
In fact all the mice with the tail to the top are nice and all those with the tail down are bellicose in detail we get:
Blue box:
Mouse with helmet
Gray mouse dressed in green
Mouse dressed in burgundy
Yellow mouse dressed in blue
Orange box:
Mouse with whiskers
Mouse with crown
Pink mouse dressed in blue
Gray mouse dressed in red with the scar on his cheek
Puzzle 27: Colorful Stained Glass (30 picarats)
Chapter 03: The Great Witch
Location: Centre of the city
Type: Color
Solution:
In this puzzle you need to repaint a window with four colors, blue, red, green and yellow that is only available once. The set is simple one color should not touch.
Puzzle 28: Twilight Exit (20 picarats)
Chapter 03: The Great Witch
Location: Main Street
Type: Finding the way
Solution:
In this puzzle you have to find the pussy of Aria who fled the city. Then you ask three knights that tell you each direction, you reconstruct the path of the animal.
Puzzle of 29-42
This part of the comprehensive guide of Professor Layton Vs. Phoenix Wright: Ace Attorney 3DS, presents puzzles 29-42 to part with Professor Layton and Luke. Some are required for the course of history and some are optional. But the more you do the more you earn puzzles precious "picarats" increasing your final score. With this walkthrough you avoid using your hint coins or lower your score.
Puzzle 29: Forklifts reversed (25 picarats)
Chapter 03: The Great Witch
Location: Library entry
Type: Travel
Solution:
In this puzzle you must help Luke and Maya to deliver carts. They must cross to reverse their positions, the solution is as follows:
Luke cart:
a box to the right
a box at the top
two boxes to the right
a box down
one space to the left
a box down
Made through the carriage Maya and finish the path with the carriage of Luke.
Puzzle 30: Goats talkative (50 picarats)
Chapter 03: The Great Witch
Location: District is
Type: Arrangement
Solution:
In this puzzle you must find the each goat, help you with their colors to make each its "bubble".
White goat Bê-Baa! Baa Baa-!
Brown goat Mee! Baa!
Chevre Noire: mee mee! Mee!
Grey Goat Mee-ee!
Black and White goat Beee? Mee-Mee?
Puzzle 31: The seven stalls (30 picarats)
Chapter 03: The Great Witch
Location: Main Street
Type: Arrangement
Solution:
In this puzzle you must place wooden animals in stalls. There are seven animals of different size and shape, each can be rotated 90 degrees.
Puzzle 32: curved sword (25 picarats)
Chapter 03: The Great Witch
Location: Porte kept
Type: Select
Solution:
In this puzzle you must find the knight who has a curved sword. The good knight is the smallest of them, the one at the bottom right.
Puzzle 33: Street Patrol (40 picarats)
Chapter 03: The Great Witch
Location: Guardhouse
Type: Arrangement
Solution:
In this puzzle you must help people to monitor the streets of the city. Two constraints, however, the streets should be monitored and the fields of vision of the people must not overlap.
Puzzle 34: Quarrel chess (20 picarats)
Chapter 03: The Great Witch
Location: Guardhouse
Type: Chess
Solution:
In this puzzle you must take the jumper with your opponent. You have the right to move your knight two squares in one direction and then one square perpendicular. Watch for holes and moving boxes leading you in the direction indicated.
The displacements are:
Top right
Bottom right (moving box)
Top
Upper left (moving box)
Top (face black knight)
Upper left (moving box)
Puzzle 35: Mousetrap (25 picarats)
Chapter 03: The Great Witch
Location: Guardhouse (hidden on the roof of the tower on the left)
Type: Tilt
Solution:
In this puzzle you need to trap mouse by tilting the table to slide into traps, but be careful not to send the cheese.
Inclinations in order are:
Right
Top
Left
Right
Low
Left
Right
Top
Left
Top
Right
Low
Puzzle 36: PIN (40 picarats)
Chapter 03: The Great Witch
Location: Enter office Narrator
Type: Combination
Solution:
In this puzzle you must open the office door Narrator, for that you must display the 3333 code by pressing the buttons.
The solution is:
Press twice on the second button from the top
Press once the button on the media
Press once the button below
Puzzle 37: Rotary House 2 (40 picarats)
Chapter 03: The Great Witch
Location: Enter Narrator office (hidden on the roof at the bottom left)
Type: Rotations
Solution:
In this puzzle you must get rid of the ghost of a house by lighting the candles. Fall on candles for light by rotating the house, but if you come across a candle lit it off.
The path is as follows:
left x3
Right x2
left x6
Right x2
left x4
Puzzle 38: Slab Madness (40 picarats)
Chapter 03: The Great Witch
Location: Grande Bibliothèque
Type: Strategy
Solution:
In this puzzle you must help the owner recover his floor in the place jumping above. That every time you jump on a slab, it turns and the surrounding tiles. Protected by a barrier slabs shall not be affected.
The path is as follows:
right
low x2
Right x2
Puzzle 39: Train accident (40 picarats)
Chapter 03: The Great Witch
Location: Outskirts of the belfry
Type: Arrangement
Solution:
In this puzzle you need to match small trains woodpile scattered.
Puzzle 40: Fashion espionage (35 picarats)
Chapter 05: On the edge of despair
Location: Market (hidden in the chimney top left)
Type: Stealth
Solution:
In this puzzle you need to lead Phoenix to the exit, being careful not to be spotted by the guards. They are equipped with lamp to see three boxes, the path is as follows:
right
low
right
low
right
low
right
top (push case)
low x2 (press box)
high x2
right
high x2
right x4
low x2
low
top
low
top
low
left x2
low x2
Right x2
left x3
left x4 (output)
Puzzle 41: Secret Alley (40 picarats)
Chapter 05: On the edge of despair
Location: Alley loss (hidden in the chair on the left)
Type: Finding the way
Solution:
In this puzzle you must help Luke find a secret passage. You have four pieces allowing you to remove four of the six symbols, symbols to be removed are as follows:
Pink
Sword
Ax
Scorpio
So you have the snake and the gold color bag.
Puzzle 42: Game of the calyx (30 picarats)
Chapter 05: On the edge of despair
Location: Tavern jane
Type: Chalice
Solution:
In this puzzle you must send the chalice Jane to Phoenix by bouncing on daggers. You may not make any out chalices table or send a green calyx at the exit.
Puzzle 43-56
This part of the comprehensive guide of Professor Layton Vs. Phoenix Wright: Ace Attorney 3DS, presents puzzles 43-56 to part with Professor Layton and Luke. Some are required for the course of history and some are optional. But the more you do the more you earn puzzles precious "picarats" increasing your final score. With this walkthrough you avoid using your hint coins or lower your score.
Puzzle 43: Slab Madness 2 (60 picarats)
Chapter 05: On the edge of despair
Location: House of the sculptor (hidden in the bed)
Type: Strategy
Solution:
In this puzzle you must reconstitute the floor jumping chocolate slab slab. As the first same puzzle, the slab on which you jump turns and the surrounding tiles.
The ideal way is as follows:
Low
Right x2
top
left
low x3
Right x2
top
left x2
low
left
right
Puzzle 44: The Game 2 cup (60 picarats)
Chapter 05: On the edge of despair
Location: Tavern Jane
Type: Chalice
Solution:
In this puzzle you must send the chalice Jane to Phoenix by bouncing on daggers. As for the other identical puzzle you must not take out the chalices of the table or send a green calyx at the exit.
Puzzle 45: Duo parrots (30 picarats)
Chapter 05: On the edge of despair
Location: Tavern Jane
Type: Find peer
Solution:
In this puzzle you must connect the parrots in pairs, the birds must have the same hats and lines should not cross:
Puzzle 46: The false cube (40 picarats)
Chapter 05: On the edge of despair
Location: Alley disaster
Type: QCM
Solution:
In this puzzle you must find the cube that is not the same, to do this you have the right to rotate.
False cube is E
Puzzle 48: Visit sewer (30 picarats)
Chapter 05: On the edge of despair
Location: Entrance to the court
Type: Select
Solution:
In this puzzle you have to find the secret passage leading to the court. To find the passage we learn:
Mr. Wright and Luke must cross one or two stone bridges
The portion is not adjacent to a flag
A candle is placed on the floor
No more than two boxes surrounding it.
Puzzle 49: A burning secret (30 picarats)
Chapter 05: On the edge of despair
Location: Mechanism stake
Type: Arrangement
Solution:
In this puzzle you must repair the mechanism of cage putting the pieces in the right place. The wheels must match the circular marks.
Here is the proper placement of rooms:
Puzzle 50: Let's shake (50 picarats)
Chapter 05: On the edge of despair
Location: Chariot
Type: Travel
Solution:
In this puzzle you must hide in the truck adjusting with goods also present.
Here is the final location of this little world:
Puzzle 51: Double getaway (45 picarats)
Chapter 05: On the edge of despair
Location: Forest of perdition
Type: Stealth
Solution:
In this puzzle you must help the Professor Layton and Maya to escape from the forest without being detected by masked figures. See the last three boxes with their lanterns. Sometimes you need to switch characters before continuing.
Here is the right path:
Maya
low
Layton
left
low x3
right
top
low
left
doite
low
left x2
top
Maya
top
low
Layton
low
left
low (output)
Maya
right
top
low
left
top
low
right
low x2
left
low
top
low
right
low
Right x2
left
right
High x4
right (exit)

Comments
Post a Comment