Bioshock Infinite - Burial At Sea Episode 1, is the first half of the additional Bioshock Infinite campaign. The story takes you through the city of Rapture, the day the last flip-flop in the civil war. There Booker DeWitt assisted by Elizabeth. The DLC features new weapons, a new plasmid, and a frame that lasts about two hours.
Table of Contents
Burial At Sea Episode 1 - Booker DeWitt
DeWitt Investigations
Market Street
Arrival at the Fontaine's Station
Flag - Second floor
Household goods
2 - Secrets of Bioshock Infinite: Burial At Sea
Burial At Sea Episode 1
Audio Logs
Watch all videos
Infusions
Achievement / Trophy

Burial At Sea Episode 1 - Booker DeWitt
The full path of the first episode of Bioshock Infinite: Burial At Sea where you play as Booker DeWitt in an even radiant Rapture but on the verge of sinking.
DeWitt Investigations
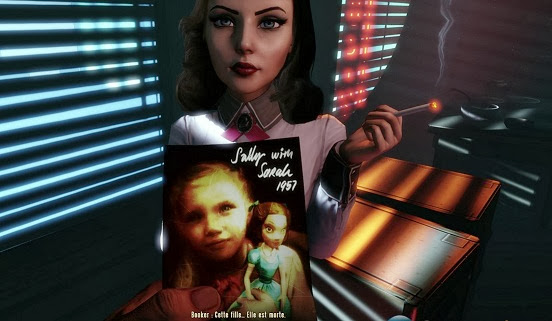
Out of a bad dream by the arrival of a customer, you get to know a cooler and older than Elizabeth in Bioshock Infinite. You approach her and light her cigarette they hire you for a very personal mission, find a little girl, Sally, think Booker died.
Discover more about Sally
Once Elizabeth left the office, then join by opening the door to discover Rapture like you've never seen. Follow Elizabeth on the stairs while you learn more about your new mission. Each individual on the street has something to say, so take the time to listen to them and immerse yourself in the life of the city of Andrew Ryan. A Ryan also has his detractors among the population even if the subject of favorite "Rapturien" conversation this evening's Eve New Year 1958 is the mass arrest of men Fontaine.
On your way, you catch a strange procession of little girl with pale face lead by a domineering woman. Booker learns that Elizabeth is famous Little Sisters of ADAM plants. Keep driving past a pneumatic tube station which serves to Rapture then come across face to face with a celebrity in the world of Bioshock, a Big Daddy at work outside of the city.
In this street, take the time to enter the building (907) to pick up a first audio diary behind the counter.
Keep enjoying the loops Rapture and visit the Andalusian Arms on the left to learn a little more about this reality Booker, before getting into the elevator at the end of the street go to the next zone.
Market Street
After the conversation with Elizabeth you arrive in the largest area of this first episode, High Street. Here you will find many shops and restaurants, which contain most interesting things.
At first, go directly to the floor on your left to enter the store house Vosges because basically, in a fitting room you will find the second audio log.
Upstairs, take the opportunity to go see the movie to learn all that is near the fountain. Descend at the Bar "Lost time" and visit the liquor store to his right to find a second film, and learn the reaction of the tenant that Booker is a frequent visitor.
Then you head to the jewelry The Golden Rule at the bottom right of High Street, but do not go in right away, prefer moving to the right, you find a new movie to know all about your left.
Continue through the door to Dinner "Watched Clock". Go to the kitchen of the establishment through a door on the right or left and pick up an audio diary on a work plan. This audio diary contains a code to enter the maintenance room.
Retrace your steps, the room is on your left opposite the cinema Knowledge for All. Enter the code 2076 and then you grab the fourth audio diary on a table.
Enter the Club Cohen
Now that you have all the collectibles locations, instead following the plot. You have probably spotted the imposing Cohen club that bears his name. This is the source of Elizabeth. Go to the entrance of the club and then knock on the door. A sign to the left of the door tells you the list of stores receiving a necessary mask to join the small group of Cohen. The Artist's Struggle, The Golden Rule, and finally Rapture records. You will have to visit each of these stores, because no matter the order of your visit, the good shop will always be the last you visit.
Retrieve the mask of a local artisan
As a first step, go to the jewelry The Golden Rule, right club Cohen. Discuss with the owner Elizabeth gets her attention. Sneak behind the counter and search the safe at the bottom of the store.
Take the opportunity to steal the jewels present then open the box, if this is your first visit, does not contain the mask. Get out of the store in time to see Elizabeth whack the owner.
Now take the stairs on your left and enter the art shop, The Artist's Struggle. Apply the same technique by talking to the owner for him to do a visit to Elizabeth. Go behind the counter, while it seeks to play a great number of young naive and impressionable girl. The mask box is located next to the vault on a metal table.
Finally visit the Rapture Records which is on the left of the elevator by which you came. Inside, talk to the owner again and go to the store while Elizabeth plays this time her card seductress. The mask box is in the right part of the reserve on a table. If you follow the order of this guide, you are now in possession of a mask invitation that allows you to access the club Cohen.
Return to Club Cohen
Return to the door of the Club, a message informs you that you can not go backwards, so make sure you have collected all the hidden objects before accepting. You burst into a room with a disturbing whiteness, go to the servant who opens a door to a room so dark this time. Go straight to finally reach the Cohen’s party.
Go down the stairs to join Cohen in person and talk to him after he coldly executed two models. Elizabeth is not deceived; the man knows the position of Sally. But before you reveal, She asks for a dance, get up close to Elizabeth and press the button on the screen to start a dance electric.
Arrival at the Fontaine's station
After your little dance with Elizabeth you come to a bathysphere towards Fountains station. On the descent of the craft, Booker takes out a gun with only three bullets in the magazine and you will get used to it because this first episode will force you to use the trap function plasmids hoped to get out alive. Things are getting serious; you discover an area reminiscent of the first Bioshock, including ruins and splicers. Take the time to search the offices and watch the two films at the bottom right and left of the room, which shows you all the talent (or madness) of Sander Cohen.
Continue until a gate blocking your way. On the left is a cold man hanging upside down with his hand. He allows you to stop you from hooks, slip on aérotube, or, attack in hand-to-hand combat your enemies. You get stuck a few moments to see splicers fight, one of them uses a plasmid ice to create a bridge.
Once fled into the elevator, you unlock the Capt'air, attack the two remaining splicer using an aerial attack then aim at the following head. Remember to search the body to find life, ammunition and money. You see through the window your destination, the building Housewares where Sally from Cohen.
Join tram
Get in the elevator the splicer ice borrowed earlier on the left. You arrive in the House - First floor. A splicer talking to myself, it's time to use a novelty of this episode. Crouch and once in the back of your enemy, hold the attack in hand-to-hand combat to neutralize once women. Other splicers roam around, neutralize them before searching the premises for money. The tram station is right in front of you, but the floor collapsed. You will need the splicer plasmid ice used earlier to build you a bridge.
Find a way to freeze water
A statue invites you to visit the Rapture on ice, an ice rink where you have strong chance of getting your friend ice. Before you move in this direction, and if you have enough money, take advantage of two distributors, which allow you to buy upgrades for your plasmids or ammunition. Please understand that to achieve success "Equipment 100%" of buying both available upgrades for the Winter plasmid of yesteryear, it is preferable to limit the purchase of ammunition and life.
Tip: If you use "Possession" on a distributor it will give you more room to pick up at the foot of the machine.
Visit Rapture On Ice
Now take a right towards the ice. The door is closed, ask Elizabeth you pick the door. You arrive in an area where many splicers trying to enter the Daily Bread. Charge your power kiss the devil to drop a trap at their feet. Once neutralized group, mind you the last recalcitrant upstairs.
Up the stairs you see the passage of the splicer ice at the bottom of the piece on a wall you find a hook as well as food. Descend at the Daily Bread and Elizabeth ask you to open the door.
Inside, kill the splicers present, then pick up the audio diary behind the counter, and the first infusion on a shelf.
On the lower floor, consider picking up anything lying around and above the piece of equipment Shirt - Mousetrap improved, behind one of the benches at the bottom right. Get out of the restaurant and go upstairs, just at the restaurant there is a vent pipe, accessible squatting.
Go inside and kill the splicer quietly inside, before recovering an audio diary and a hook on a box. Exit the vent and destroy the turret with a fire trap to begin to raise the success / trophy "Luddite confirmed" that requires you to destroy 10 turrets.
In fitting rooms left collect equipment Pants - Leech immoral and hook on the table. This loop area, return to the frozen part, and hang with your Capt'air to cross the chasm and go upstairs.
A battle rages between several splicers, let kill each other and finish the victors. Think recover equipment Hat - devilish eye on the counter Workman's wear. Before taking the elevator Home Delivery, enter the Haberdashery store on the right.
Go pick up a new audio diary in the dressing room at the bottom right. On the left is a new device Hat - Extended Strike.
Remember to destroy the turret that protects the premises until a splicer not care if you want to get success / corresponding trophy. Once finished, take the door marked Deliver Home Elevator to access the second floor and see the face of men changed into ice, you're in the right direction.
Flag - Second floor
Upon arrival on the second floor you notice an aero tube that leads you to the upper floor to the ice, but before you get there, cross the room to the back door that leads to the section Womenswear. Enter quietly in the jewelry shop on your right, because of rodent splicers.
Once the site cleared from enemy presence, ask Elizabeth to open the door at the bottom left against 3 hooks. Inside, pick up the audio log that contains the code.
Coming out of the room, your eyes are certainly attracted by an infusion on the stalls of the store, between several models. Beware, because the model is not one, and you are attacked by a group of splicer, kill them before getting the infusion.
Then exit jewelry shop asking Elizabeth to unlock the door without the need to join the worst hook shoe store on the floor. Get rid of splicers and pick up the hook in the hand of a corpse near the counter. Then use the code 0928 recovered in the previous audio log to open the locked door.
Inside, you face a splicer and turret fire to do the talking your way in the back room that contains a new audio log. Also retrieve the equipment Pants - Agility which is on a bench.
You're done with the women's department, return to the central pavilion and use aérotube to reach the top floor. Neutralize splicers number and before joining the rink still made a stop at the extreme left of the premises, in the department of plasmids Fontaine to collect a famous plasmid.
Kill the splicers then ask Elizabeth to open up the vault in the center of the room against 3 hooks. Inside, you can not find unless infusion and an audio log.
Then pick up the bottle containing the plasmid located on a display in the store right. You are now about to reach the ice. Get out in the central pavilion and take the large door in the center.
Souvenir shop in front of you can be open by bypassing and using your plasmid against the door mechanism. Inside, you pick up a newspaper and audio equipment Boots - Almighty. There is also a safe Elizabeth can open against one hook but that contains only money, always useful to buy improvements plasmids.
Eliminate splicer ice
Continue towards the ice, this time a second store on the right can be visited. You will find a rifle on a frozen body. Then get ready to fight, because you will face one of the biggest gatherings of enemies in this first episode. Act discreetly and abuse traps plasmid to neutralize multiple opponents at once. If you run out of ammunition or Adam, you can find valuable resource in the round platform.
Take the Winter plasmid of yesteryear in the window
Once the dust settles, approach the small window in the center of the room containing the plasmid Winter yesteryear and ask Elizabeth to pick the lock. But the plasmid is no longer there, only empty bottles remain. Elizabeth opens a loophole to reality or the bottle is still there. Recover plasmid that allows you to freeze your enemies and water. This also marks the beginning of the appearance of faults Elizabeth can open and represents a significant supports in clashes saw little ammunition present.
Return to burst pipes first floor
Return to the central pavilion and kill the splicers then descend to the lower floor using aérotube. Use your plasmid to restart a lift at this level and climb in to join in an instant the first floor. Remember to look under the lift itself to get money and equipment Shirt - Magic Bullet.
Create an ice bridge leading to the tram station
Your route is marked out to the tram station, still take the time to join the Ready-to-wear store on the left, using the plasmid Winter yesteryear to create a bridge and go retrieve the audio diary in one of the dressing rooms at the back of the store, not without having cleared the scene of the presence of splicers.
Return to finally create an ice bridge in the center of the flag to join the tram station and consider recovering equipment Pants - Earnings Mortel on a bench to the left.
Take the tram to the housewares
Then head to the bathysphere at the bottom of the room and pull the lever to join the department housewares permanently. So be sure to have recovered all the items before leaving this level.
Household goods
Upon arrival to housewares, you see Sally being charged by a splicer before fleeing in a vent. Kill the splicer and then interact with the leads but without success, the girl has already taken off.
Elizabeth is a map of the proposed facilities and close each output and increase the temperature to remove the child from the central exhaust. There are 5 windsocks to close. Search the site and do not forget the hook at the foot of the dummy in the kitchen on the left, and Elizabeth ask you to provide access to the electronics section.
Close all windsocks
In this large room is a windsock to close. Of splicers trying to get Sally, the duct pulling with a teddy bear. Prepare them a trap to get rid of the group quickly then close the air intake. An elevator shaft lies destroyed on the ground, pick up within an audio diary containing a code that will give you access to a powerful new weapon later.
On the right of the room, and a part flooded is electrified by electric cables. Use your old Winter plasmid to freeze the water surface and go pick up the latest episode plasmid, Comber. It allows you to levitate enemies in the air for a few moments.
Now go to your left for a visit to the Bistro. Inside, defeat the first splicer discreetly then kill those on the lower floor, with your electric plasmid feet when they are in water. Then close the new handle to room air and pick up the audio diary that sits on the kitchen counter.
Elizabeth Booker then pointed the presence of a mysterious weapon behind a gate, it is a stove-radar. Enter previously found in the audio diary of the elevator or the 3958 and pick up the devastating weapon code. Attack splicer allows you to quickly test your new toy. After some exposure to the radius of the weapon, the splicer hit explodes causing damage to surroundings. To achieve success "Chain Reaction", do not hold the shot too long, because the weapon is another splicer automatically once the first shot. Load your shot rather a splicer and wait it explodes before firing again.
Get out of the bar and through the door Appliances - Toys. Eliminate splicers then go retrieve the audio diary in the customer service section.
Close also the air intake. The safe contains the desk this time although money and alcohol against 3 hooks to open it. Make sure you have at least 4 because you need to get an audio diary afterwards.
At the Toys, the path is blocked by an electrical battery. Ask Elizabeth to pick the shop door for wedding dress against one hooks.
Inside, kill the splicer delusional and pick up the audio diary behind the counter. Take also the equipment Hat - Elementary Surprise.
Then take the left path to the library. Mount directly to the floor to close the following windsock and take care of splicers.
Descend to the ground floor and go through the door at the bottom near cash registers. Close the last door on your left, just before asking Elizabeth to open the showroom door.
Find central exhaust toy department
In this new room, kill the splicers in the drawing in the flooded part to use your electric plasmid or attract their attention by opening the lure fault. Next door is unfortunately locked from the inside. Elizabeth proposes to crawl into a ventilation duct to go open. Make it short scale and get ready to experience the arrival of several splicers. Once the last wave, return to the Elizabeth door opens.
Now take the left and create a bridge of ice with your old Winter plasmid to access an office on the far left contains the latest audio diary episode allows you to unlock the success / "Lover" trophy. Also pick up equipment Shirt - vital Rail next door.
Back up the stairs and turn right to the toy section. You arrive in a huge room, traveled a long aérotube. You approach the windsock for Elizabeth throws a glance. But the little Sally has yet to show the tip of his nose.
Adjust the temperature
Spend the large double door behind the vent and then go mushrooms to reach the door Employees only. In this small room turn the crank to raise the temperature up. A cry rang out, return quickly at the windsock.
Catch Sally
Interact with the windsock to the little girl out, but it resists and then you are attacked by his protector!
Remove the protective
A tough battle awaits you, use your plasmids to slow protector and allow you to inflict damage with your guns. Beware its drill-grab it uses to bring its level. Use the width of the room and it contains many resources to overcome the monster metal.
Save Sally
Once defeated, return to the windsock and interact with to complete this first episode of Bioshock Infinite - Tomb submarine!
2 - Secrets of Bioshock Infinite: Burial At Sea Episode
In this part of the guide Bioshock Infinite: Burial At Sea Episode One you will find all the secrets of episodes 1 and 2 or the full audio newspapers, cinemas and Knowledge for All infusions.
- Burial At Sea Episode 1
All the secrets of episode 1 are listed in this part of the complete solution of Bioshock Infinite: Tomb Submarine.
Audio Logs
In this section you will find a video of the 17 audio logs hidden in episode 1 as well as pictures of each of their position.
Audio diary # 1
Shortly after leaving the polling Booker, in the lobby of the building number 907, go behind the counter to retrieve the first audio diary.
Audio Journal # 2
Enter the clothing store "Maison Vosges" and go into the dressing room at the bottom right of the store to get their hands on the second audio log.
Audio Journal # 3
Take the right entrance of the Golden Rule and continue until the restaurant "Watched Clock." The third audio diary is on a table in the kitchen.
Audio Journal # 4
Once in possession of the third audio diary, you have a code to enter the maintenance room. Retrace your steps, the room is on your left. Enter the code 2076 then you grab the fourth audio diary on the table
Audio Journal # 5
Once in buildings Fontaine you catch the splicers trying to enter the "Daily Bread." Once the threat is removed, ask Elizabeth to open the door using a hook. Once inside, go behind the counter to find the fifth audio diary.
Audio Journal # 6
The sixth audio log is above the "Daily Bread." Crouch to pass through the vent line and neutralize the splicer to retrieve it in the box marked with a rabbit.
Audio Journal # 8
Enter the jewelry and Elizabeth asks you to open the back room right against three hooks. The eighth audio diary is on a desktop.
Audio Journal # 9
You get a new code in the audio diary # 8, go to the shoe store above jewelry and enter the code 0928 on the door at the bottom left of the store. Inside, watch a splicer and turret. Once the scene quieted, you grab the ninth audio diary on the desk.
Audio Journal # 10
In the department of plasmids Fountain where you get the electro quartz is a locked safe. Ask Elizabeth to open against three hooks. Inside is the tenth audio diary and a brew.
Audio Journal # 11
Once in possession of the plasmid, head of the rink in the "Jackfrost's Village." On your way, the "Jackfrost's Souvenir" seems closed. Use your electric plasmid to bypass the door and allow you to access the eleventh audio diary on the ground, in the snow.
Audio Journal # 12
Once the Winter plasmid of yesteryear in your possession, go to the store ready-to-wear on the ground floor by making a bridge of ice. The twelfth audio diary is located in back of the store in a dressing room, behind a bench
Audio Journal # 13
After taking the tram, you arrive in a room with many screens where you have to close your first sock. A destroyed elevator shaft git floor, inside is the thirteenth audio diary.
Audio Journal # 14
The fourteenth audio diary is on the lower level of the "Bistro" on the kitchen counter.
Audio Journal # 15
Way to close a sock in order to get Sally, you can find the fifteenth audio diary on a desk in the "Customer Service".
Audio Journal # 16
To the right of the neon sign "Toys" is a wedding dress shop. Ask Elizabeth to open the door. Inside, a splicer delirium. Disable it, then pick up the sixteenth audio diary behind the counter.
Audio Journal # 17
After Elizabeth's crawled into a vent you open the door, take the immediate left and then fabricate an ice bridge to enter the office at the bottom left which leads the latest audio diary. You unlock at the same time the success / trophy "Lover."
Watch all videos
Rapture as Colombia has boxes of cinema that you learn more about the game world do not the subject of success / trophy we have has nevertheless identified to help you make the most of information scattered throughout the game
Watch all # 2
Watch the second video is all over the coffee "Lost time" beside a fountain. It presents the topic "Cleaning up business Fontaine."
Knowledge for all # 3
Watch the third film for all to the right of the "Golden Rule" jewelry in the passage that leads to the restaurant "Watched Clock." It presents the topic "The Protector".
Watch all # 4
Once in neighborhoods Fontaine, take recess right to find the fourth cinema Know for having a "work" strange Sander Cohens, The Black Dream.
Knowledge for All # 5
The fifth and final film Knowledge for All is the exact opposite of fourth in the recess on the left. It has a second work of Sander Cohens, The March Hare.
Infusions
There are three hidden in the game that allow you to improve the skills of Booker infusions. This part of the walkthrough gives you their location.
Infusion 1
The first infusion is in the "The Daily Bread" restaurant, you will need the help of Elizabeth and a hook to open the door. Infusion is on a shelf behind the counter.
Infusion 2
The second infusion is in jewelry. You must initially open the back room with Elizabeth and three hooks. When you leave the room, the infusion is on display next to what looks like a mannequin. As you approach, the "model" comes to life. Slay her and her accomplices then you grab the infusion.
Infusion 3
The third and final infusion is in a safe in the plasmid section Building Fontaine. Ask Elizabeth to open with three hooks. Inside is also an audio diary.
Achievement / Trophy
Achievement / Trophy Episode 1:
You found all the audio logs underwater tomb - Episode 1.
Equipment to 100%:
You bought two old Winter improvements or stove-radar underwater tomb - Episode 1.
You destroyed 10 turrets in underwater tomb - Episode 1.
Dinner is ready:
You blew 5 enemies with the stove-radar underwater tomb - Episode 1.
Chain reaction:
A wounded 15 enemies by exploding one with the stove-radar underwater tomb - Episode 1.
Icebreaker:
You blew 5 enemies frozen by the winter plasmid yesteryear.
Snowball effect:
You have two frozen enemies with the same trap Winter of yesteryear.
Under water:
You used a bathysphere in underwater tomb - Episode 1.
We advance:
You took the tram in underwater tomb - Episode 1.
Underwater tomb:
You have completed Tomb submarine - Episode 1.
Comments
Post a Comment