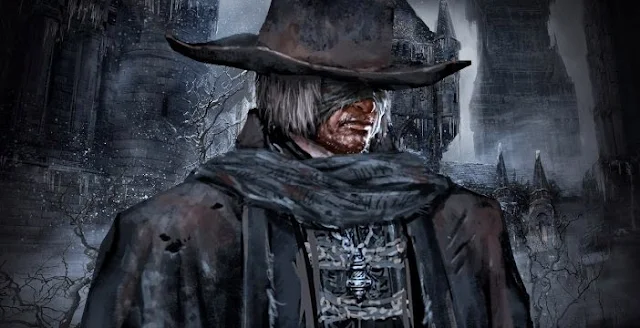
Enemies and bosses in Blood Borne
This guide is intended to give an overview of the bosses in bloodborne waiting for you. Here the choice of weapons is mostly a matter of taste, so the battles are exemplary.
This guide is intended to give an overview of the bosses in bloodborne waiting for you. Here the choice of weapons is mostly a matter of taste, so the battles are exemplary.
Cleric Beast
The Cleric Beast can be found on the big bridge (center Yharnam). Since finding is not a big challenge.
Boss profile:
The cleric beast is big and act quickly. The action range is not to be underestimated, so if somehow keep distance as possible.
The "head" is a weak point, keeping him under constant fire, there is less resistance. In addition, the beast is sometime in the knee. Here you can run the devastating "guts attack" R1 , In the melee, if you go through the legs, you have a chance of success. Jumps shortly before a hostile attack by the legs, and attacked the stilts of the creature with a few blows.
Tactics:
Head fuel (ranged weapon)
Swag:
Blood Echoes (4000)
Father Gascoigne
Father Gascoigne is really nimble on his feet and can not even bribe with beer (like his namesake). After the first boss battle leaves the second grueling battle not long in coming. Crossing the pond on the other side of the "Great Bridge", you see sometime a huge wild boar in a tunnel house. Take the stairs again and crosses a bridge to get to Father Gascoigne.
Boss profile:
In this boss fight, you have two phases survive. At the beginning you see Father Gascoigne still very similar. In his human form, he has high speed. In this case, its reach with the ax is very low. You now have two ways to kill him. Wait until he attacks you and break him with a shot from the gun. With any luck, he drops to his knees and you can use the "guts attack".

If you have any more bullets, deviate from its 3-combo and strike twice. Immediately after your attack, you have to jump to the left to avoid his shot from the shotgun. This he sets namely a forever once you have met him a few times.
Once his life bar filled one-third, he transforms into a large beast - this is phase 2. Now the fight is a bit trickier. Both speed, damage and increase his reach is enormous. Remain at a safe distance and try to run around the fountain. In his attacks he stays and hangs on to the grave stones. Land hit the beast occasionally pull back a little and make a battle cry. Forward and strike a Father to Gascoigne, until it rises again.
Tactics:
Phase 1:
Headshot and subsequent visceral attack
2 - Combo with evasive maneuvers to the left
Phase 2:
Well use as a cushion / keep his distance
Three to five hits during the battle
Weaknesses:
Fire
Swag:
Blood Echoes (1800)
Blood Hungry Beast (Blood-starved Beast)
Blood Hungry Beast can be found in Old Yharnam. To get there, you have the path with the sniper survive. Then you come to a church in a lifeless Beast body hanging from the ceiling. Crossing them survive the attacks of the five werewolves and even expect you to just now lifeless beast in a kind of cathedral.
Boss profile:
Before you dive into the third boss fight, you should fill up to stop your supply of antivenin. Enter the building, you will find very back of the room behind the statue three rations of the antidote.
The blood-hungry beast has few attacks in stock - that it is very fast. She gets most of his right arm and kicks from left to right. If he so in front of her, can you two to three hits land before it escapes to the left. Alternatively you can for the slightly stronger attack (Beast inspiring both longer off) directly under her legs roll. So it does not suffer a hit and lands directly behind the creature - after a few blows on the hairy rump, you can repeat the tactic.
Have you emptied about a third of life indicator, the poison comes into play. The beast puffed up, as it is surrounded by poisonous spores. This should keep its distance, as you will otherwise poison very quickly and continuously lose energy. Strike now continue on that monster, until her life is about 25%.
Blood Hungry Beast is now again really angry. It increases speed and damage and knocks to often. The tactic remains the same. We recommend a ranged weapon (like the whip) and a few bullets in the magazine. Stunned the beast with the gun and applies the guts attack.
Tactics:
Two to three hits / evasive maneuver to the left
Shot shortly after the opponent attack / subsequent visceral attack in paralysis
Distance hold because of toxic spores
Swag:
Pthumeru-cup
Blood echoes (6,600)
BB: Opponent - Invisible village Yahar'gul
Name: ???
Antagonist profile:
- Fast and powerful
- Can jump far
- produces a cone of light -> loads up and is extremely fast
Tactics: When shooting attack; Visceral attack (2x)
Prey Blood Echoes (1368)
Additional end including Boss
Now if you've defeated the last boss, you should have enough
healing items because you come immediately to additional boss without you
before retool. Defeat him and you see the extra end.
Rome , The Mindless Spider
Loot: 12 Relatives cold blood
Micolash, host of the nightmare
Boss Profile: Micolash is a small, almost normal translucent opponents. He surrounds himself in the multilevel courses with dense fog and difficult you with feeble servants life.
Tactics: He will appear here and there in the corridors and waiting later in the centrally located space for you. He attacks with either his arms or tentacles lights up and misses magic bolts. However, it can be quickly brought out of balance through targeted bats - which does not make it just difficult to control. If he has only half of his life energy, then run the locked room still left along the stairs and let yourself fall down.
Loot: 48,400 blood echoes and Mensis cage
Curate Amelia
Boss Profile: This Boss impressed first of all by its size.
It reminds a little of Fuchur from the never-ending story, only evil. Your
greatest asset is punches on the ground. The pressure wave generated thereby
adds powerful you hurt. Also it has the ability to regenerate its health bar.
Tactics: Weaknesses are the head and limbs. Supreme rule
should however be: true distance. There are moments when the vicar is bright
golden yellow erect and seems to take a break, then this is the time of bats.
You could encircle and weaken aimed blows from behind. In general fast forward
to the attack, retreat and dodging.
Loot: 15,000 blood echoes and gold pendant
Shadows of Yharnam
Boss Profile: Not only one, no, three opponents await you in
the Forbidden Forest
Tactics: Try it first with the melee take as it should never
lose sight of. So until someone else grabs it, then sooner or later you have a
sword in the back. The shadow with the long sword should first believe it.
Dribble past not so spectacular lash and over again until you can put an
attack. Degree of severity of attacks hit the cowl carrier quickly to the
ground. Is a shadow while dying, all be transformed into a second phase. The
guy with the flamethrower is now in melee strike with a burning heavy and also
the guy with the Fire Magic will deal more. Small tip: Grade later when her
only fights against two of the guys, it is helpful behind the large grave stone
right (from the entrance) "entrench" to. Since the Spellcaster always
keeps his distance, he will guide you.
Dark Beast Paarl
Martyrs Logarius
Dark Beast Paarl
Boss Profile: Have you fought through the underground prison
and followed by a hole in the wall of a small tunnel, then you come to a large
inconspicuous place. At this the dark beast Paarl is awake and tries to
electrical attack. This boss opponent is actually purely optional and need not
be necessarily opposed.
Tactics: As this opponent is very "electric," it
is especially recommended to wear an armor suit, which may have a good
flash-defense. Of course, any other armor is useful. Who wants to can then
stock up with the Rune. There is little to fight, what you need to pay
attention. Paarl is mainly attack with his big paw, which you should avoid it.
You have to try somehow to get his bones and there to land a hard blow or more
blows. Where a strong attack is recommended to bring Paarl out of balance -
that brings you more time for other surprises. Pay attention to the electrical
explosion that emits Paarl, when he does not attack and stops. By the time
Paarl is no longer lit, you know that he will start surface attack.
Loot: 23.1oo blood echoes and sparks Hunter Badge
Witch of Hemwick
Boss Profile: she is the bone until ends along in the last
building meet her on the Witch of Hemwick.
Tactics: The Witch of Hemwick always makes herself invisible
and is first found. At the beginning of her first settled the creature and then
look for a red light. Go there, because near the little witch will then appear,
where you should attack her quickly. She will then disappear more and summon
creatures, although not necessarily need her fight. Continue to respect the red
lights and beat the witch to 0 life energy down. At that moment, a second witch
will then appear and then you have to also overcome two witches.
Pay attention back to the lights, ignored the creatures at
the top and tries to beat witches fast. Die one; the other will try to revive
her. Therefore, both should defeat at the same time. An attack that you can
make dangerous is when it lights up blue. Differ from the spell, as it
captivates you. If the witch next to you, she will make you quite a bit of
damage.
Loot: 11,800 blood echoes and low blood
Heavenly Messenger (Celestial Envoy)
Boss Profile: If you are in the Upper Cathedral district and
you have been fighting over there in the many werewolves in the left side of a
corridor that leads you to several enemies that absorb you. Complete all of the
Item "orphans key" and use it in the lower region. You hit left on
this blue alien-like creatures. Follow the area and you are in the area boss
bargain, and may fight against many of these blue creatures. The Heavenly
Messenger is the passive of all opponents. This boss opponent is optional and
need not be addressed.
Tactics: This fight is pretty easy if you like having a
weapon ax with a long range. Do not worry about all the adds that evoke the
Messenger, but take the Messenger of equal even targeted. It's like saying the
one who does not attack you. In the bustle bit hard to see because it looks
like all the others. Once he reaches at 50% life energy, he gets bigger. The change
tactics is not great. The Messenger is not nimble, you can avoid his attacks.
Notice his adds not but leave the Messenger one on the head - he does not hold
a great deal from.
Loot: 22,400 blood echoes and "Communion" -Rune
Ebrietas, daughter of the cosmos
Boss Profile: Optional, but important to the dungeons.
Ebrietas is a big tentacle monster with a flair for vermin you. Her long
tentacles she uses as a defense against small enemies. If it is aggressive, it
acts faster.
Tactics: It is important that you first try to read her attacks.
You will mainly at the beginning with her big tentacles. So keep the distance.
Now and then she will tear up her arms and clap with full force to the ground
gives way here from the side or back and tried to put here some targeted bats.
Always stay in motion and proceed to the acid spitting. You
will get hit, your madness display increased. With armor without good madness
resistance here you can quickly bless the time. Normally, these attacks are
simple but of yielding. A sore spot with Ebrietas is its rear side (left or
right). There, they can not seem to do much against you. So if you have after
one of their attacks (eg if it has forward) a chance to come there, and use it
to beat.
MERGOS nurse
Boss Profile: Once you have found the highest point in
Mensis nightmare, you are allowed to come closer to a strange shape. MERGOS
nurse hidden under a cowl and has three sabers on both sides, with which they
deal not squeamish.
Tactics: This boss fight is easy, especially in the normal
phase of the nurse. With her six swords they will usually try to reach out to
you, and they oscillate back and forth. Since she is quite slow, you can drop her
in the back and strike there neatly with severe attacks. However, you should
note that if she swinging the sword back and also likes rich and good
times back to you. The point where it is safest, is as follows: beats MERGOS
nurse with all the swords simultaneously forward (when she stretches the sword
in the air), she lingers for a while in the position - perfect to her with a
severe attack to wound.
A little hectic it is when she lights up purple and she
appears as a double. This phase is to survive with happiness. Concentrate here
on the nurse and try to give as many punches in her back until the phase ends.
Alternatively, you can also try to dodge all the time (which may prove to be
difficult) - this phase ends after a while and she fights back to normal.
Loot: 72,000 blood echoes and a third of a cord
Boss Profile: A King? Who knows, at least he looks like. You
come to the guy when he crosses castle Cainhurst. Reach him in turn on a
carriage on the road Hemwick bone, if you have an invitation from Iosefkas
clinic there.
Tactics: The first two phases are the most feasible. Try the
chimney on the roof as "protection" to use. In the 1st phase Logarius
attacks will start, sometimes sporadic or large. Let you not catch them and
trying to come up with clever dodge in the near Logarius. In the second phase,
it is his scythe unpack, among other things and thus make life difficult. His
attacks are either completely normal in a combo or he reaches from the top, so
you have to dodge here at the right moment. This gives you the chance to fall
in the back and one to land two blows. In the third phase it is likely that his
annoying "Adds" in the form of arrows to which he lays down. Prefer a
more corner and fights Logarius in the same style as in phase. 2
Loot: 25,000 echoes
Gehrman, the first hunter
Boss Profile: Who would have thought that we must fight out
of the house last boss battle against the mysterious guy in wheelchairs? But
only if you talk to him and then "Reject" selects. Once this is done,
you can look forward to a final end.
Tactics:
Phase 1: A crucial phase in the boss battle is the first
one. Gehrman is struggling with a scythe, which gives him especially lateral protection.
So wait for the right moment to attack when Gehrman grade - and then quickly
perform a visceral attack from! This makes it good damage and you come out well
from the 1st phase.
Phase 2: Starting with the fact that he half-kneeling and
roars short. That is very good to at least put a short (or even heavy) blow.
Then you should fall back again. Gehrman lights now on bluish and is nimble on
the road. It changes again and again his weapon, but basically means nothing
big for you. If he has his scythe but no more, it's a little easier to land at
the right moment a targeted strike. Tips when he rises into the air waiting for
a moment when he has beaten in the air and then gives way at the right time to
the right. To deprive of the pressure wave that makes a lot of damage, at best.
Presence of the Moon
Boss Profile: The presence of the moon is an optional boss
and is part of one end of a total of three ends. You can fight only under
certain conditions against this creature. Previously, you have to find at least
three of the following four umbilical cords:
- Defeat MERGOS nurse in the area Menses - nightmare for a
[One-third of a cord].
- Another third can be found in the abandoned workshop -
Oedon chapel.
- Iosefka drops a third, if you beat him in the clinic in
combat. If he does not fight, then you can just kill and gain the umbilical
cord anyway.
- You will meet Arianne on the way from the cathedral
district to Byrgenwerth. Defeated then MERGOS nurse and then returns in the
sewers under the Oedon chapel back.
Consume all three (or four) before talking with the hunter
in a dream and then selects as usual "Decline" from. You must first
defeat Gehrmann.
Tactics: Lots of news awaits you not in this fight. You have
already in the game can fight a few beasts as bosses and this one is the
easiest. She does not act aggressively arg what you offers scope for avoidance
and monitoring. Pay attention not to get caught by the presence and adjusts it
as soon as she stops. For then follows an explosion and you should have kept
some distance. Can you hit a good landing on his head, then even an effective
guts attack is possible.
Loot: 276,000 blood echoes
BB: Opponent - Invisible village Yahar'gul
Name: ???
Antagonist profile:
- Fast and powerful
- Can jump far
- produces a cone of light -> loads up and is extremely fast
Tactics: When shooting attack; Visceral attack (2x)
Prey Blood Echoes (1368)
Additional end including Boss
So you can see this end and measure you with the secret
boss, make sure your needs 3x a third of a cord, this you have to find and use,
before you go to the final boss.
You can find it at the following locations:
1) The victory over MERGOS nurse.
2) The slaughter of babies by NPC Arianna. You've got to
this in one of the closed doors on the safe place to point (unfortunately mine
is the exact location unknown) and later may this strange man nothing to tell of
the chapel. After defeating the nurse, she should then sit down with the head
in the Cathedral on a chair and the baby is in front.
3) In the old workshop. After defeating the bloodthirsty
beast, the little door opens into the cathedral to the right of you, if you
travel there with lantern. Follow the path and then run in the tower is not
pure but surrounded him and jumps down at the broken body, making you come to a
gate that leads you into a very deep space. Here you have to just to the left
of you jump on the small wooden platforms (very deep and therefore high fall
damage) to reach a door in the workshop. The umbilical cord is located at the
same position (similar to the refuge), ie, at the altar where you put your
runes equips / replaced.
4) Through the forest, where you have found this little
village, you can reach the clinic, of course, an area that was previously not
accessible. Look around there until you find a room with a relatively narrow
staircase leading to the top. It is important above all that you do not
continue to go up, if you warn a woman Agreed her.
Only when you about Rome ,
have completed the spider, she will no longer warn you and you can go up. Speak
to her, she lies there on a kind of table (not exactly know the name). After
she told you from the pain, it kills you and take the item.
Boss Profile: The Boss is surrounded by small spiders that
make him only times heavier. You can still want to be close to the spider boss
and empty it health bar with attacks from near. Be vigilant it means when the
spider sits up and strikes the blow to the ground. Spontaneously changes of
sites are not rare by Teleport.
Tactics: spec on vitality, because you have to run very
fast in order to avoid or quickly get to the boss. The small spiders are
cleared quickly out of the way with a sweeping blow. The mindless spider Rome is to change from
the nearby well. It sits up quickly run away, because then also appears blue
crystals under the lake, which cause great damage.
You do not have to focus primarily on the spiders when Rome misses crystals. Then
it is important to choose a gap between the spider and then to this until you
are on the side of Rome .
At best, you can still land a heavy attack.
Micolash, host of the nightmare
Boss Profile: Micolash is a small, almost normal translucent opponents. He surrounds himself in the multilevel courses with dense fog and difficult you with feeble servants life.
Tactics: He will appear here and there in the corridors and waiting later in the centrally located space for you. He attacks with either his arms or tentacles lights up and misses magic bolts. However, it can be quickly brought out of balance through targeted bats - which does not make it just difficult to control. If he has only half of his life energy, then run the locked room still left along the stairs and let yourself fall down.
Loot: 48,400 blood echoes and Mensis cage
Comments
Post a Comment