The Huns are a fraction that has no fixed place to which they have settled. You are a wandering folk and consequently almost always movable. However, it is possible to set up stock and bring there business and the military into shape.
The playful challenge with the Huns is independent of the degree of difficulty in "heavy". We show you how you can proceed with the Huns (other strategies are also possible).
Overview
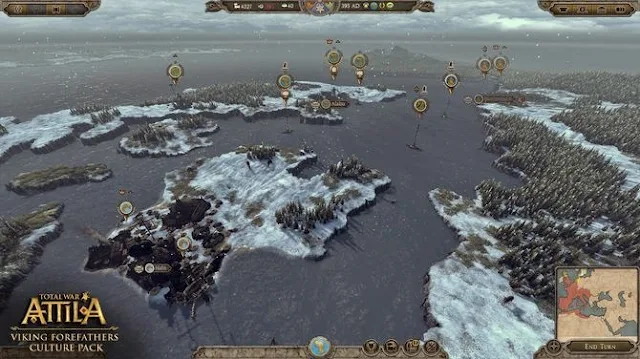
The Huns start with three hordes. If you can see it better, all three of the world map zooms out. In a pinch, you can also view tactical by pressing Tab call.
You can see the top of the bar not only the year, but also the time of year. This is your "evidence" for the first goal of the Huns - survive until the year 400. So a total of five years. To the left you see the war chest as well as the amount of gold that is earned a round.
In this case, the war chest clearly shows that it has decent money and a little more than 1000 pieces of gold per turn are important. Though the number of red here, you would make every round a minus.
The family tree
About the Group icon at the bottom of the screen you call on the family tree. You see here the main characters of your faction. In concrete terms, we have Uldin the group leader on board. The good thing is already less than 57 years old and probably his best days are already close behind. We expect here so with his death in a few years.
As you can see, Uldin has two sons, Kuriak and Charaton. Your main focus should be on Charaton. He is 38 years old, performs one of three hordes and - importantly - the legacy of Uldin. So he will be the group leader sooner or later.
Before we leave the family tree again, we should assign the two sons an office (red arrow). In this case that would be the official "Terrible Rider". Click on the character, and then click the Office Grayed offices not yet available. Pay attention also before the influence (red circle) - 20 of which are consumed for the post.
Additional: Terrible Rider
The Office "Terrible Rider" has the following prerequisites and grants the following bonuses:
Minimum age: 18
Minimum Rank: 1
Influence Cost: 20
Bonuses:
Personal influence: +1 per impact (which has a positive effect)
Recruit: -6% for cavalry (All armed forces)
Unit Experience: +3 for cavalry recruits
Goals
Now take a look at the targets. Here you can see what you should do your best with the Huns. Met their objectives namely, you waving rewards and rewards are always very good.
There is a distinction between the primary objectives - in this case, the surviving until the year 400 - and secondary objectives. This grant you, as already mentioned input, rewards, and give you a good thread.
Secondary objectives of the Huns:
Gain dominion over 3 tribute States.
Technology research "Forced militia".
Destroy 3 different villages / rob. Including the following: Marcianopolis, Dvin
Sassanid Empire declare war.
Obtain from the Eastern Roman Empire a diplomatic toll on the 1500th
Some secondary objectives are difficult, others easier to achieve.
Technological aim
A brief detour into the technology screen. Here you will find the technology "Forced militia" who needs it for completing a secondary objective. Explore this once the first technology in the military branch before you can enlarge examine compulsory militia.
Forced militia brings you the following bonuses:
Recruitment costs for infantry fell by -10%.
Spearman steppe can be recruited.
Steppe Spearman: replaced Heerbann with the Steppe.

Character and army
Before you finish the round, we also want to have some fun. Click once on Charaton. He leads the Horde to the west of the Gelonus settlement. You see in the bottom of the screen then his army and left some info about him.
Under his portrait character you can call up the character screen and the Army screen. But more on that later, if there is to make something there. You look at the army icons. The icon on the far left (red circle) is for the "position" there.
You can send your troops, for example, here at significantly higher speed run or just build a warehouse, which is important for the Huns.
Using the number (green circle) recognize how big the Horde is. Theoretically, here to be trained for 10 units.
Tactical View
The Tactical View calls with it Tab on. Based on the screens you recognize the current situation of the Huns.
The Allies are on the map as blue (even lower than the cities / settlement names you see a bluish tint) recognizable. These are the tribute States that have the Huns at the beginning under their control. You can refer some money and are theoretically able to join with
wars.
The red areas as well as the red-backed group names are the enemies, of which you should stay away for now. Direct confrontation is not recommended.
Battle for Gelonus
What goal is worth attacking? The Huns are simply the people of the looting and destruction. Attacking approach is thus always an option and the only way to evolve as Hun fraction.
With Charaton we are not far away from the Gelonus settlement. This is a really good goal to provide his position of power to the test. Click only the Horde and select right-click Gelonus. Confirms the act of war and diplomacy comes into area. Confirm everything and you are at war with the slaves.
The Gelonus settlement is defended by a small number of troops. You should be in the majority (recognizable by the yellow-red bar: yellow signifies your strength and red for the opponent). To perform a manual battle here almost not worth it, as the balance of power yet very strong fails to Charatons favor. Select reason "Auto Attack" and then select equilibrium as a martial art.
Rob or Tear Down?
The victory should be as good as certain. You still look in the small overview of how many troops the enemy has lost and how many have bitten with you on the grass. It should not be so many on your side in the normal case.
Then it comes to the fate of Gelonus: rob or tear down? We recommend simply rob Gelonus because the tear down has no added value and we still think of our goal with the tribute States.
Rank Advancement
By conquering the settlement is your general, so Charaton ascend in rank. The rank advancement granted you two skill points that you can distribute them freely.
An important capability in the future could lower left (penultimate ability) to be "Feudal Lord". It guarantees us Horde growth and a higher tax rate by the Horde. Until we get there, invest points in the ability of lightning and vanguard.
Lightning brings you a higher attack rate by arrows and the cavalry vanguard include an increased range of motion on the campaign map. Both are very, very practical skills. Also always remember: the Huns love horses! Cavalry should always be at the top if you can improve things there.
Peace Agreement
Before you go, we opt for a peace agreement with the slaves. Call for the diplomacy menu (alternatively press function key 9) and select the fraction from the slave. "Make Offer / Assets" under it simply select peace agreements and already see the bottom of the screen, how likely it is that the opposing faction takes.
In this case, the probability is high, not least because our group but pretty good balance of forces (yellow-red bar). However, Geil Amir has a higher power rank. So we can first from him, the north is once taboo. Although winter is still something there, but a war should start, then you would have very effectively and quickly proceed. Troops wear in cold weather is ugly - so we avoid that.
Set Up a Camp
The mobile fraction, it is important that we set up camp again. Our Huns they hit a comparatively small battle against Gelonus and have a little lost on troops. To achieve our full capacity again, we must open stock.
So we take Charatons "whirlwind" and go with these somewhat to the south. Caution: Respect left on the action points (green box). These indicate how far you can go. For a stock, but still have 25% of the action points left (one bar section).
Then click the flag icon on the left, and then select the stock symbol. You will then see the different effects, so bring a camp with them. Among other things, of course growth. Another important factor is the aspect of money. Prosperity in this case. The building that drags an army, wealth, and / or food is produced - and combatants wear is prevented.
Building View
With the Huns economic progress is not always easy, but doable. Have you set up a camp, you can go to the "Building View". Here you can see your current active building of the army. What should I build?
Our gold stock gives us basically no reason to be concerned. Technically we are also food with 85 food units but relatively sound. Yet we should move forward and these values mend.
We intend to increase our army. For long-term prosperity is needed to earn gold. Charatons army currently holds 10/20 units, so we can still recruit 10 troops units (mercenaries are due to high cost no alternative). We see in the Building view six building sites. Five of them are occupied with buildings (indicated by the Roman numeral indicating the building stage). The sixth building lot so we can show with a brand-new building.
Develop Economy
We click the sixth building lot so choose and for the goal of developing prosperity the "artisans". This consumes 5 of 5 currently existing population of our warehouse. This population comes with growing number of laps but slowly back again. Based on the building browser (right-click on a building site or a building), we see the available buildings divided into stages.
This brings us +400 prosperity of industry, as well as increased population growth (to build buildings) and reduce construction costs. This is a quite nice investment that you should make later. In the fifth slot (blue arrow) by the way let's see how their wealth and food you want to combine.
Food is important so that your armies again "regenerate" in the camps and no riots are expected. Goat or shepherds make two good ways to ensure food. You will receive a goatherd significantly more food than by a shepherd camp, but less wealth than the shepherd camp. Which building you choose, so depending on how you want to align yourself. Remember: the more troops, the more food you need too.
Comments
Post a Comment